

36 49 N, 28 18 E
Marmaris Yacht Marine, Turkey
(We play catch-up with this entry. It was drafted nearly two months ago, but we’ve fallen out of a rhythm of getting updates posted – there has been not so much time spent chasing the boy, checking weather, traveling to and fro, sailing, up-keeping, socializing, and so on. With this quite cathartic entry, we seek to turn a new leaf.)
We put the boat into Yacht Marina in Marmaris last November for a winter’s stay. We estimated that we could return in February and would need about three weeks to get the boat ready for the season. Maybe a month.
We were right that it took three, but months, not weeks!

If we’ve learned any lesson on this trip, it’s that it is nigh impossible to estimate accurately how long any given repair project will take. This time, we had a lot of things to do, but they seemed like such little things . . . .
But boat projects are a little bit like gift wrapped boxes. Your guesses as to what’s inside are, by their nature, somewhat random. Could it be a new cell phone? A piece of fruit? A train ticket to Chicago? Some brightly colored beads? Shake shake shake. It rattles. It’s not a train ticket, unless it’s wrapped up in some beads. Could be rocks.
Here, let me provide an example to illustrate the point. (Yes, the following description goes on at length, but you only have to read it. I had to do it!)
On the cold February day that I returned to the boat, I figured that I’d tackle an easy project first. Something light to get things moving, build up some confidence, and cross something off the long to-do list.
There had been some problems with the bilge pump. It had been cycling on and off every ten minutes. That is, it would pump water out, and then, ten minutes later, pump the same water again. (Before we had left the boat for the winter, I had confirmed that it wasn’t a leak, and just the same water coming back down the discharge hose. This problem wouldn’t sink the boat, but it was wearing on both the pump and our nerves.) The pump also ran a bit slow – it took a while to evacuate even a small amount of water. Finally, the pump had a tendency to get air locked, and would sometimes run continuously before it self-primed.
These things weren’t supposed to happen. But the fixes shouldn’t be too difficult, either.
There is a check valve on the bilge pump’s discharge line. (Actually, the previous owner had installed two. That is a bit of overkill. There are good arguments not to have any check valves on a bilge pump, and certainly you only need one to do the job; that is, to keep sea water from being siphoned back into the boat should the angle of sail put the transom’s discharge opening under water, and to prevent the pump from cycling the same water up and down the discharge line.) I figured that all I would need to do was remove the lower check valve from the line, take it apart, clean it up, put it back, the line would then seal properly, water would no longer flow back into the bilge, the pump would not run as slowly or get air-locked, and we’d be done – cross it off the to-do list!
The bilge pump, however, had other plans for me.
I took the check valve off and opened it up. It was 30 years old, but like most things on the boat, a good, strong piece of kit. It was made of bronze and well-machined. But it was old. After I carefully cleaned it out and put it back together again, it still wouldn’t seal properly – I could blow air through it. Sigh. I’d have to get a new check valve, but that wouldn’t be too big of a deal.
Since this check valve was no longer functioning, it made sense to take a look at the other one too, where the bilge line exited the boat.
I did so. As I manipulated the hose, I made note of how old and brittle it was. I flexed it hard. Cracckkkk!!! It snapped cleanly in two.
That’s not supposed to happen either.
OK. No worries. Not all of the hose seemed bad – only that part that was near the back of the boat, and frequently exposed to salt water. Maybe I could get away with just replacing that section?
No, the whole thing looked a bit ancient. The bilge pump hose is not something you want to skimp on. I’d need to replace the entire run of hose.
(I pause here for a query. Please, what part of the boat’s mechanical, canvas, rigging, electrical, electronic, structural, or plumbing systems may I skimp on?)
The day was almost over. I added a couple of things to the to-do list, and resigned myself to the fact that this project was not going to take a mere hour or two. But maybe I could still get away with a day or two?
As I investigated the replacement of the hose and check valve, I began to take a look at the previous owner’s bilge pump set up more closely, and to do some research on how bilge pumps should be plumbed.
The configuration was all wrong.

Our bilge pump sees daily service to remove “grey water” from the shower, and it has always done an adequate if somewhat slow job. But the primary purpose of a bilge pump is to clear large volumes of water from the boat in the event of a sudden and semi-catastrophic ingress of water into the boat – a blown thru-hull, for example. For this purpose you want a beefy pump, a large hose, few impediments, and a run that is as straight and as short as possible to get the water out of the boat.
Our set up was deficient in several respects.
First, the hose was too small. Good for removing shower water, but much too small for emergency purposes. Second, the hose left the pump pointed forward, went through a bronze elbow, then the check valve, and then made a sharp, 180-degree turn toward the back of the boat. Third, as I read the previous owner’s notes, I saw that the boat had come with a 6,000 gallons-per-hour pump, but that he had at one time downgraded it to a unit rated for 2,000 gallons-per-hour. With the smaller hoses and turns and check valves, it was probably doing 300 gallons per hour.
I began to re-design. The bilge pump would be turned around, facing aft, so that the hose could run straight out of the boat. The size of the hose would be increased. A second 2,000 gallon per hour pump would be added on top of the current pump, set with a float switch to kick on if the first one were overwhelmed. The second bilge pump would be plumbed with 1 ¼ inch hose, to allow it to really get water out in a hurry.
We’re on day three now.
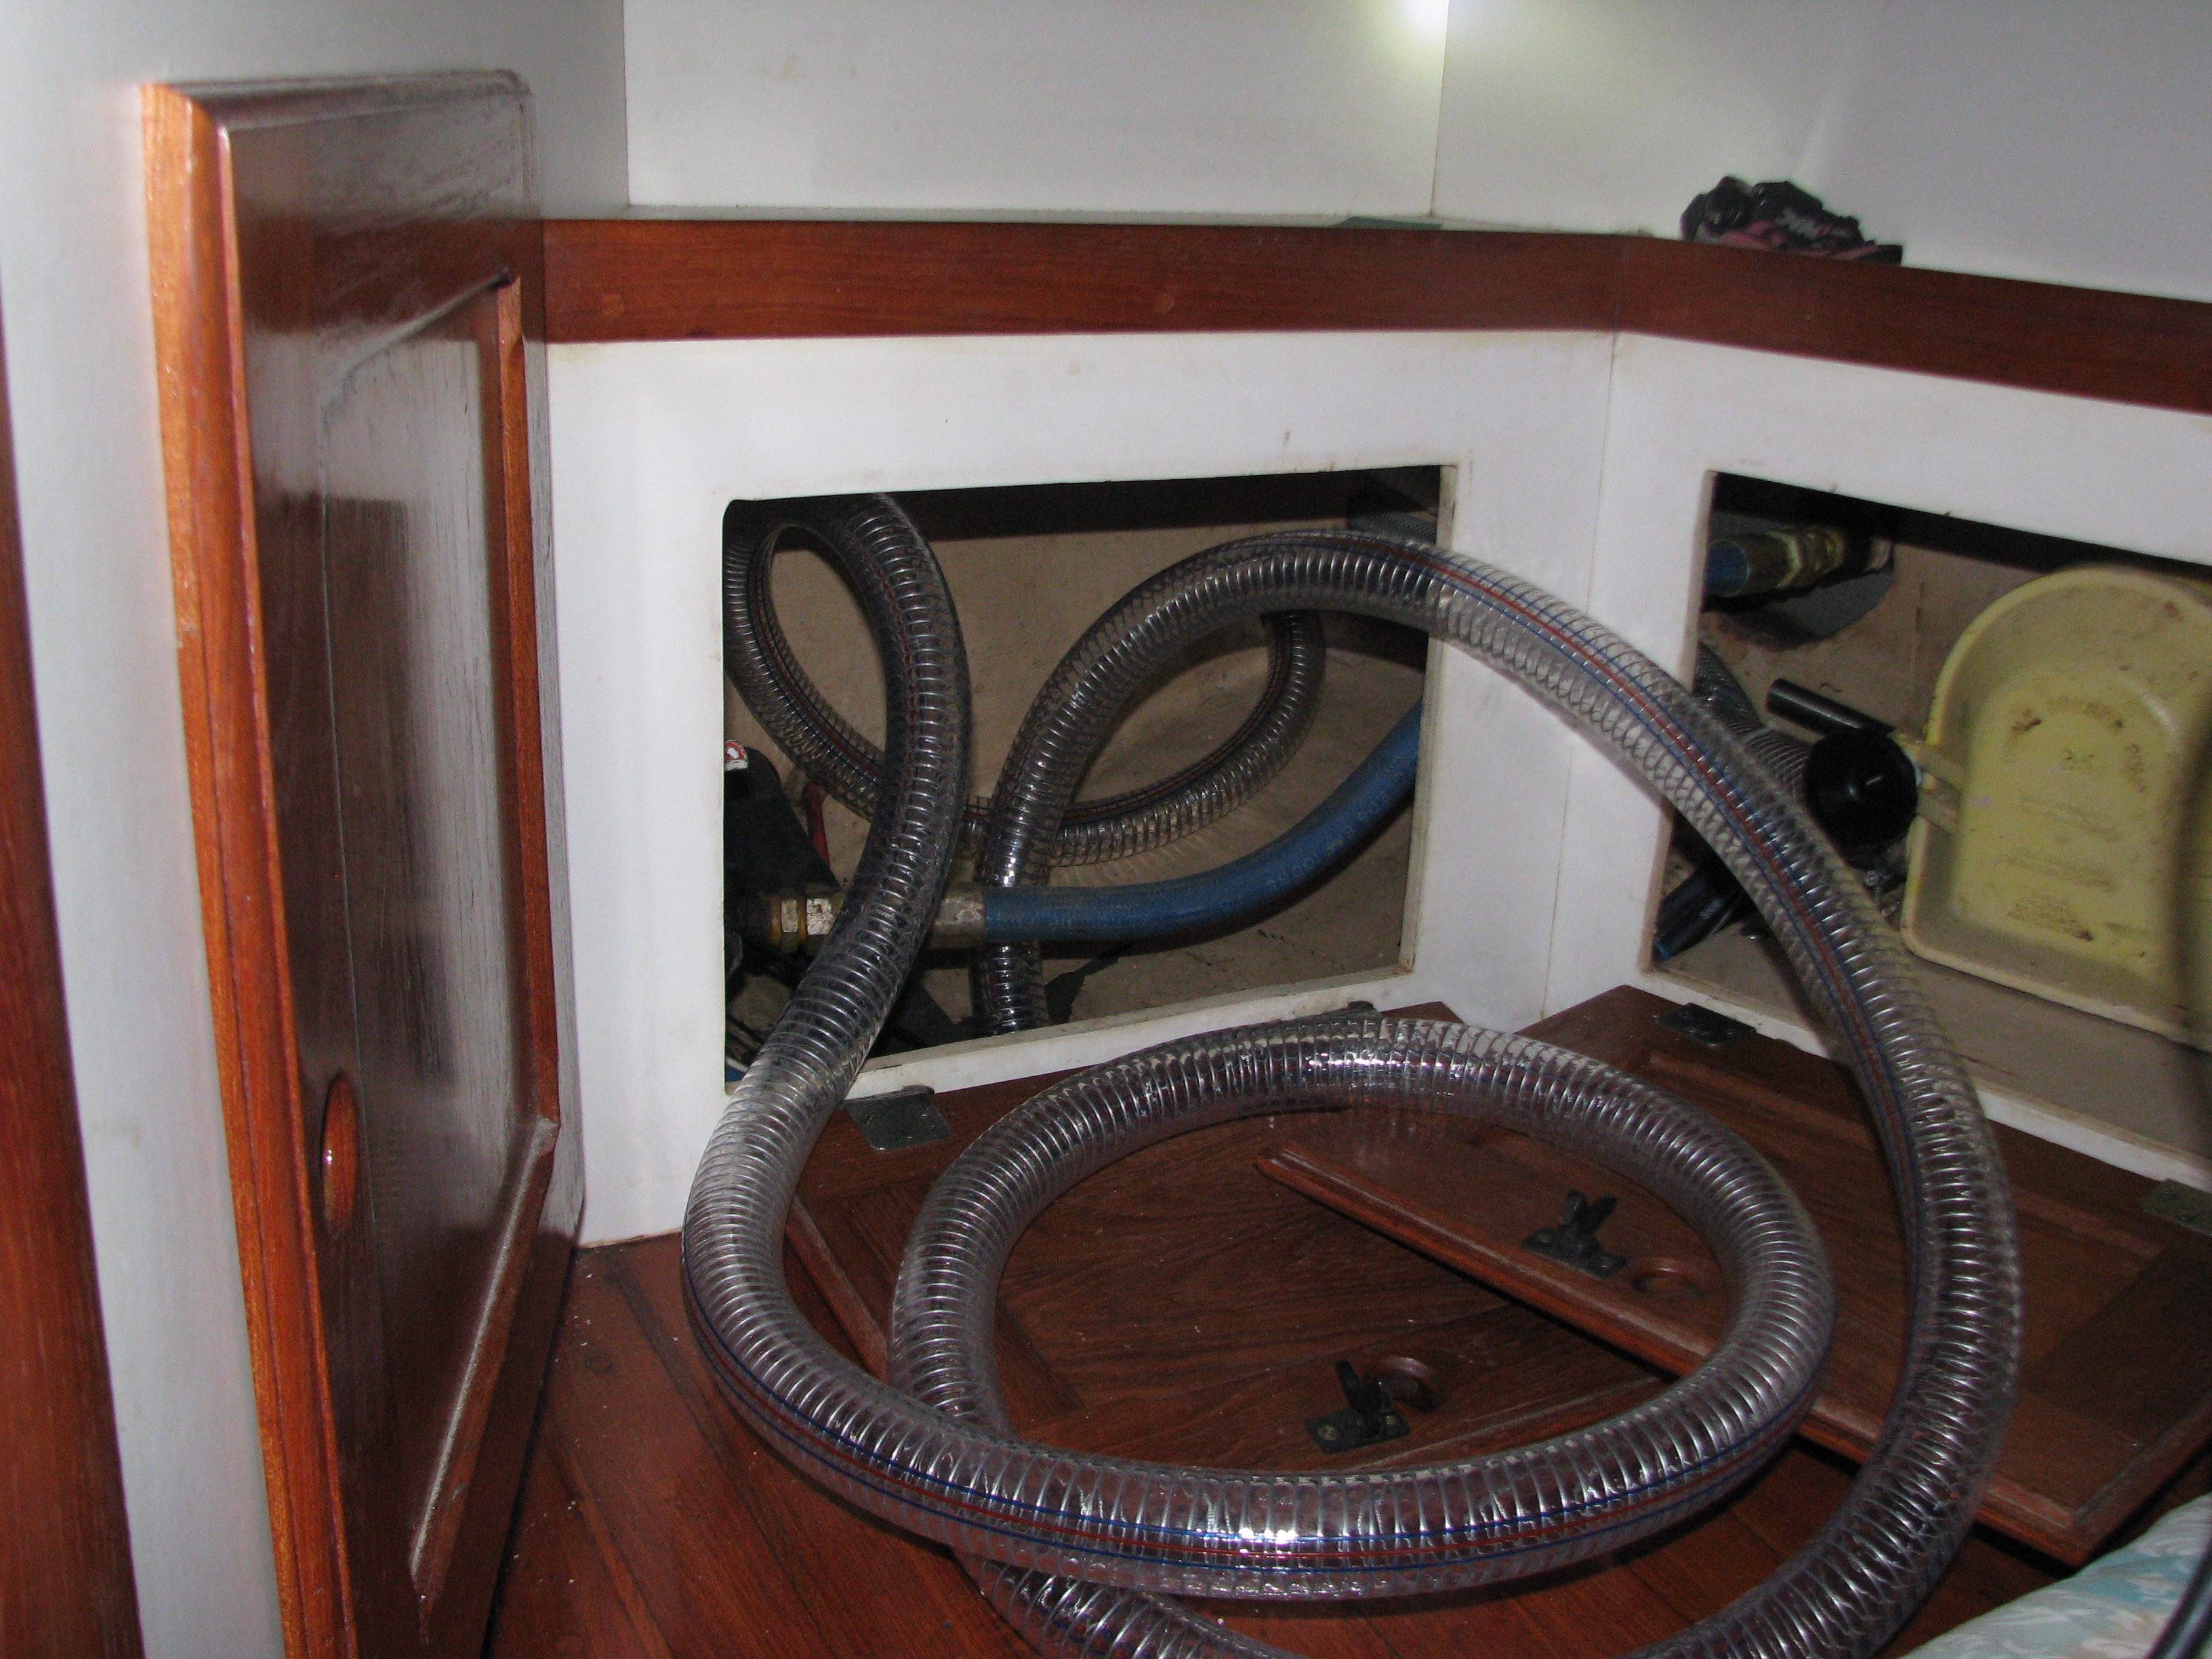
I purchased the new hoses and plumbed them through the back of the boat. This required some new holes to be cut or current ones enlargened, through the relevant lockers. The chandleries didn’t have all of the needed “Y” and step-down “T” connectors that I would need, and so those were machined-to-order at a stainless steel shop in Marmaris’ industrial district, as was a sturdy stainless steel “L” bracket onto which the second pump would be fastened.

I also plumbed a new release valve just above the check valve at the lower pump. I could open this release valve and blow off any trapped air if the pump became air locked.
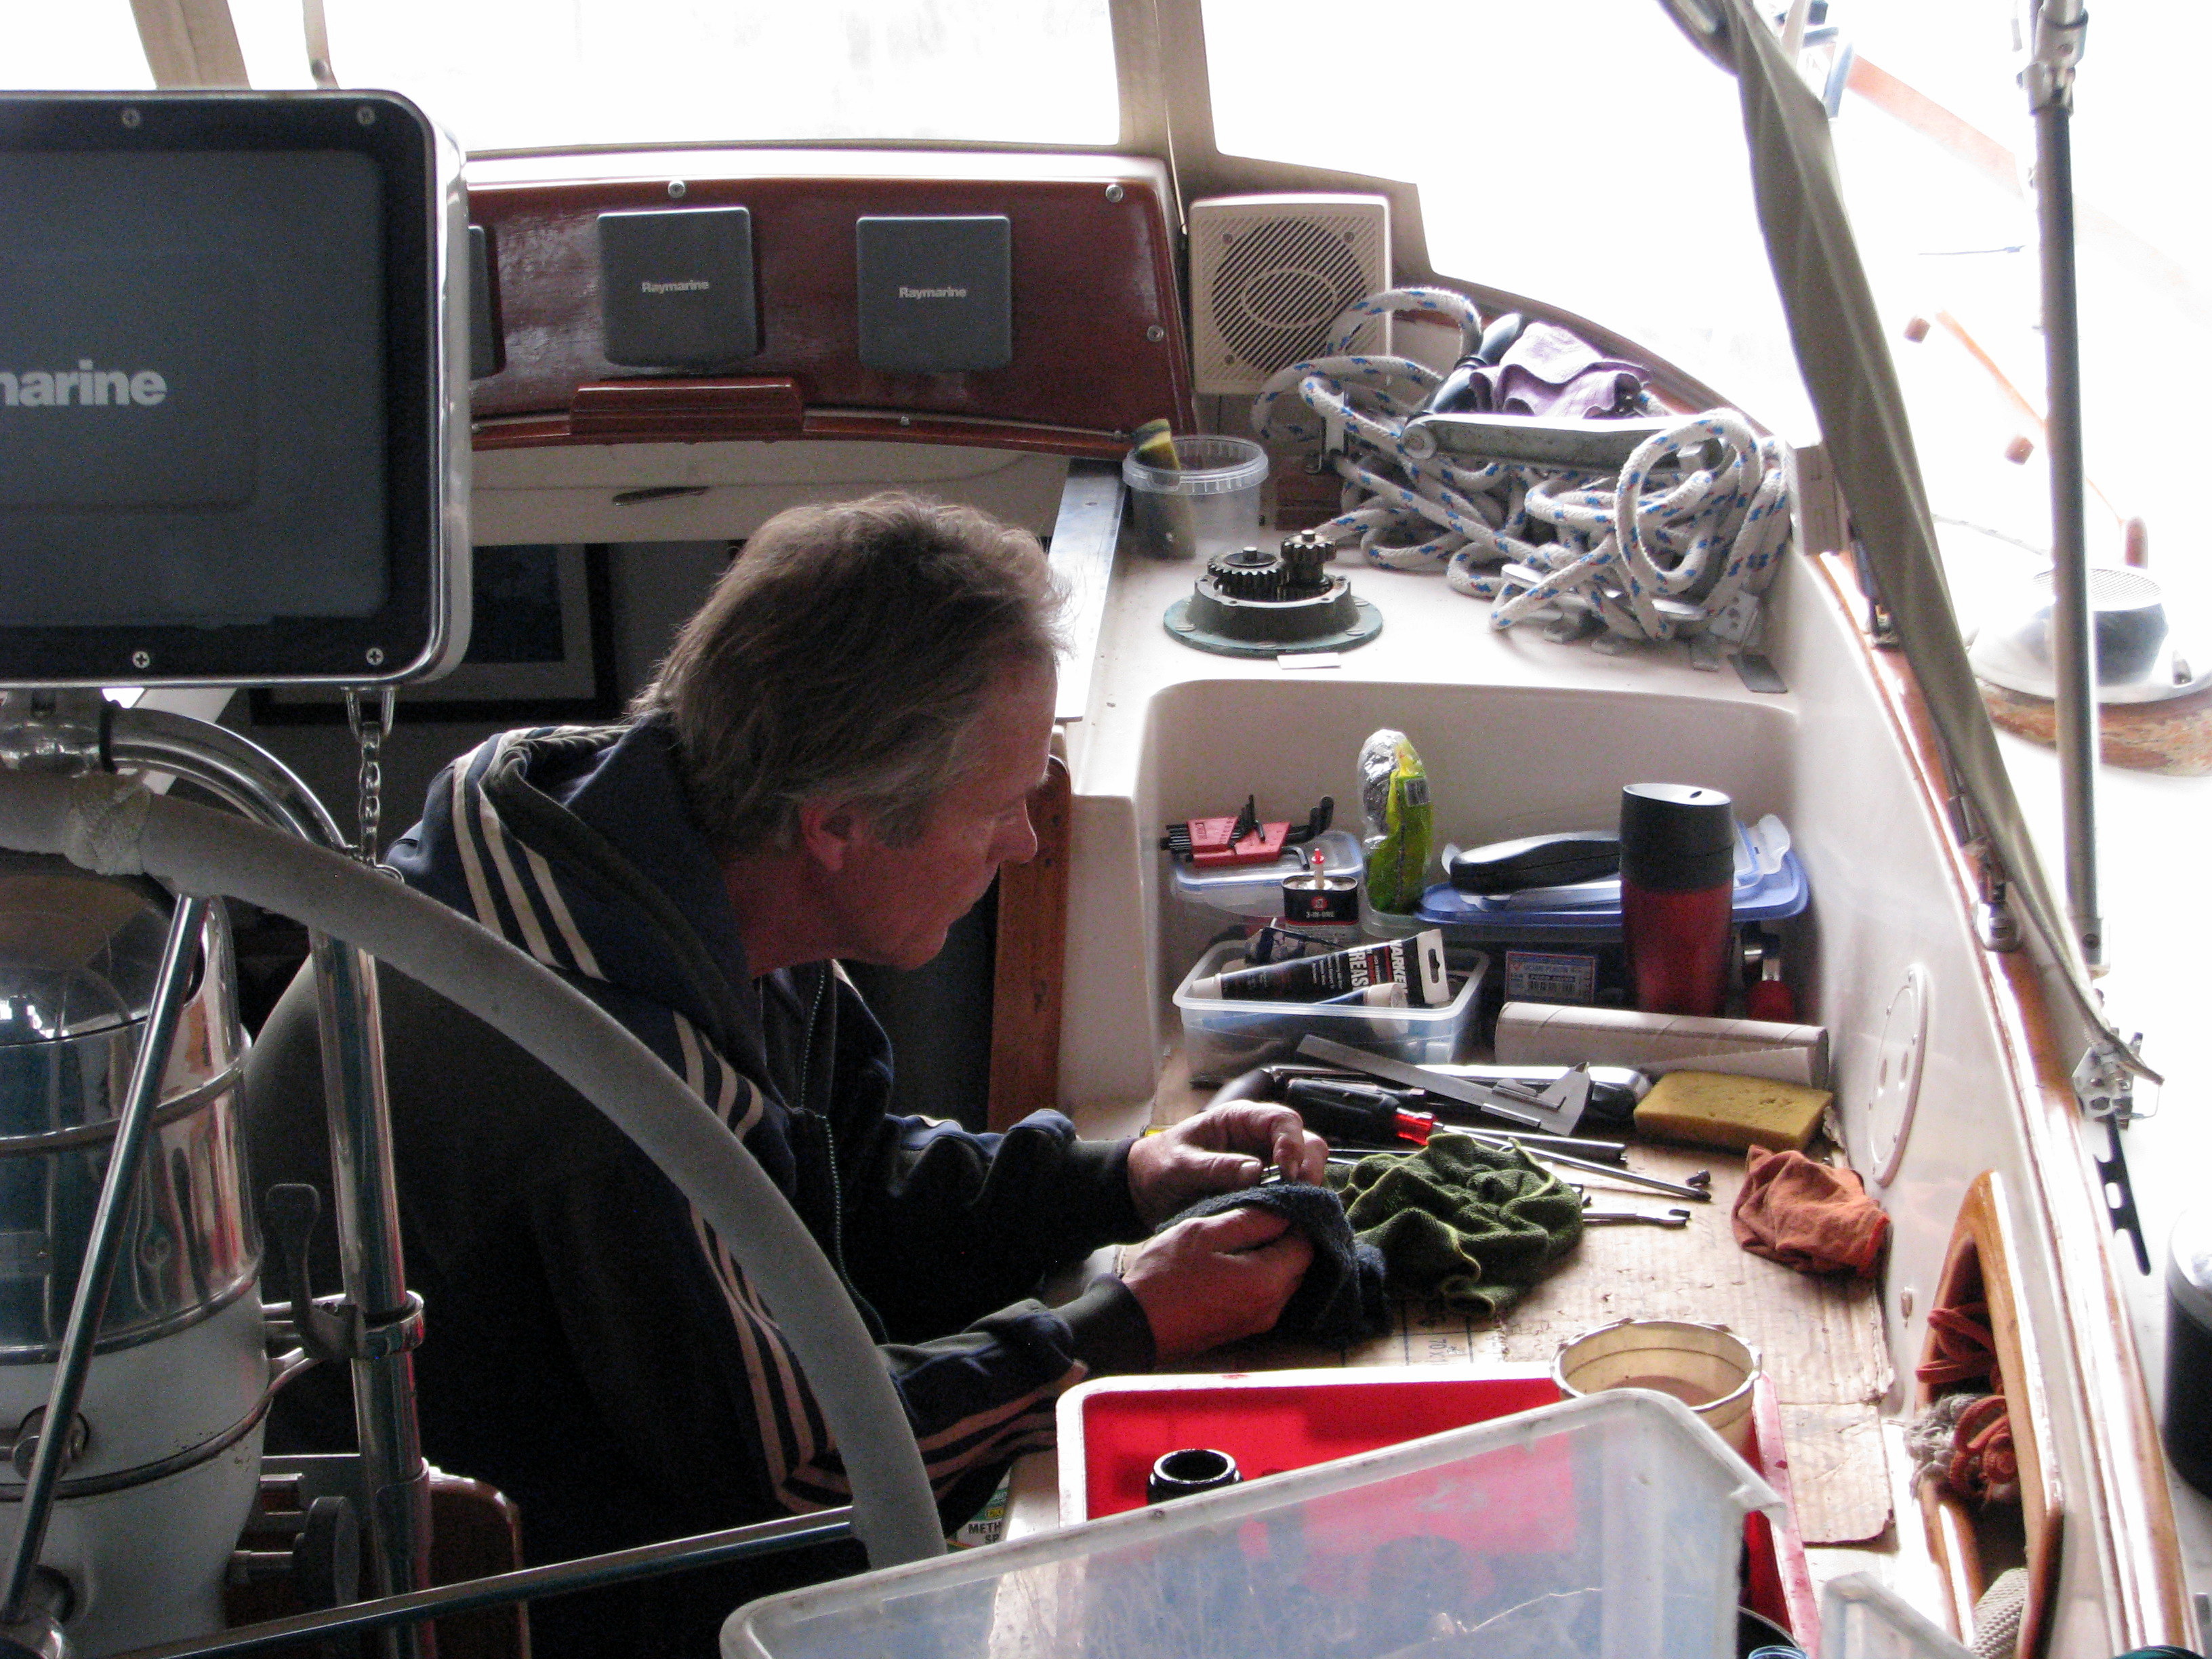
Eventually this was all finished. In light of the fact that I was doing some other things at the same time, and setting up other projects for a fellow that was now helping me(*), a week or so had now passed. (*I met Mats, a Swede on a nearby boat, Taifun, in the pool room/library one night. He came over for about four hours a day, and helped me knock off some projects. We were a good match. I needed some good help, and Mats was a diligent worker in need of some pocket money. With Sima back in Istanbul as I took the boat apart, he was also a good companion.)
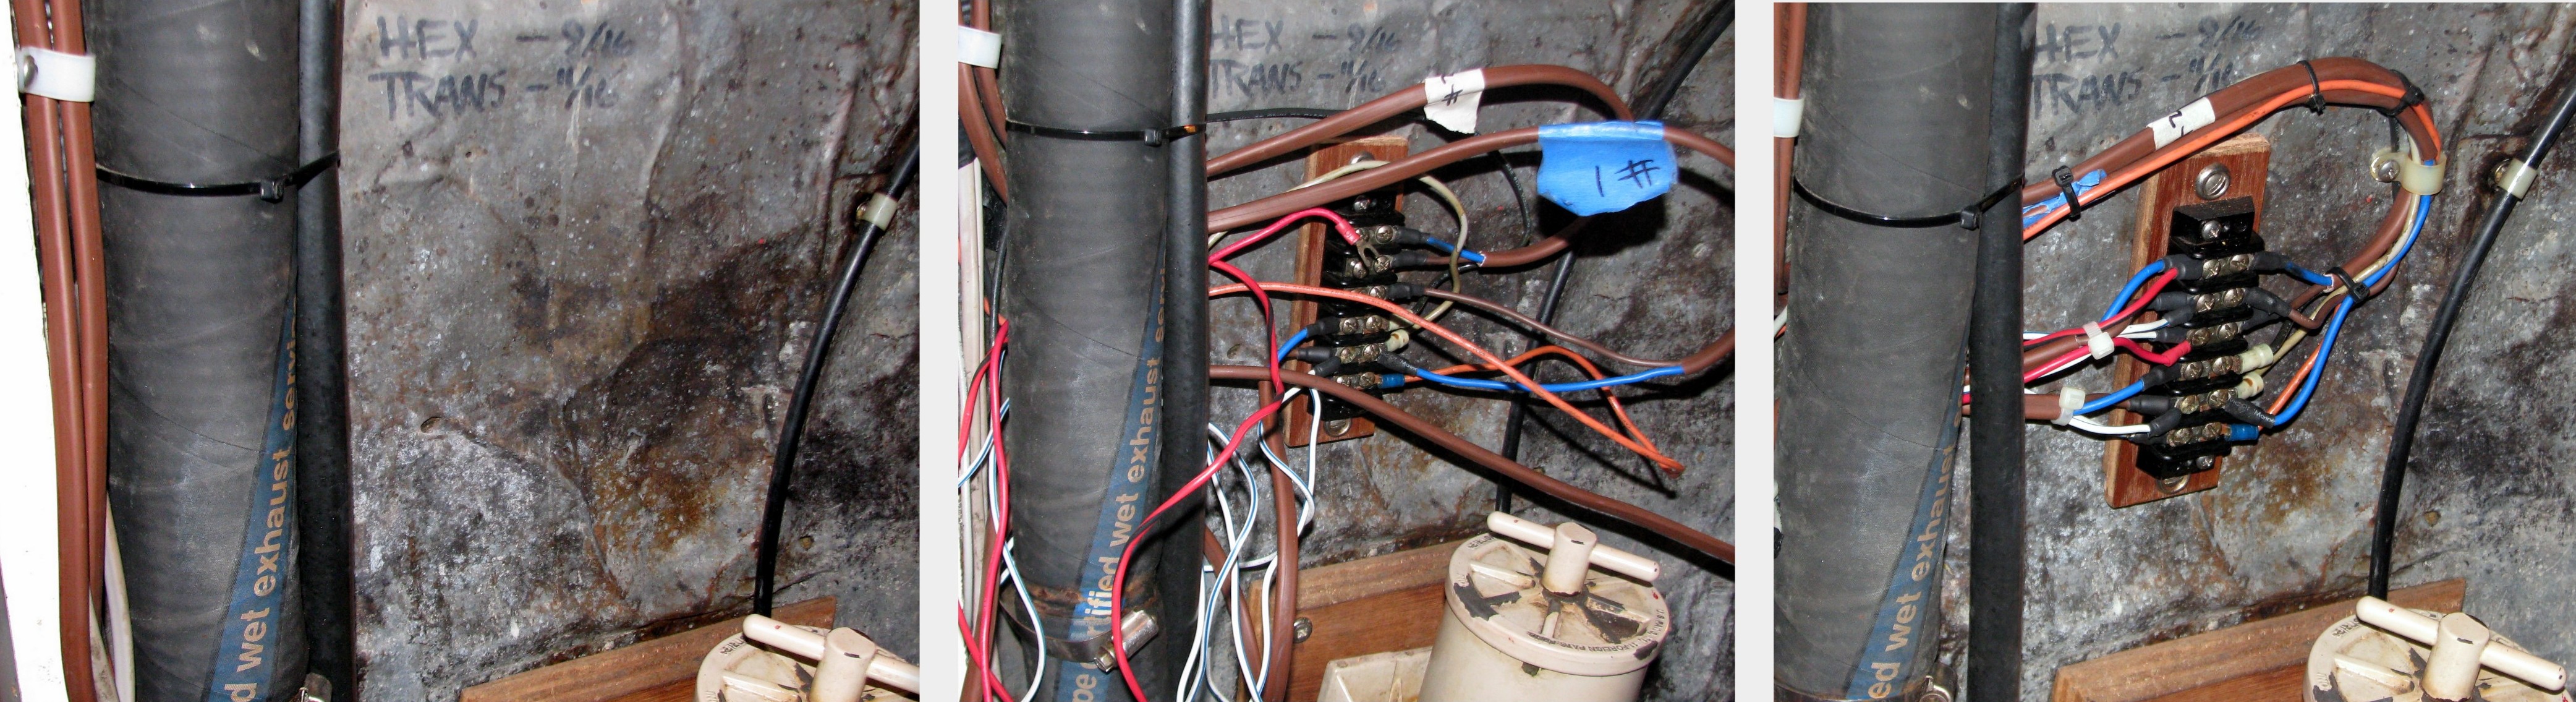
I now turned to the electrical side of the bilge pump. I reviewed the set up and prepared a wiring diagram to have as a reference should problems arise in the future.
The wiring, too, was messed up. First, the positive and negative feeds from the electrical panel to the pump were reversed! This explained why the pump was operating so slowly. It has a hard plastic spinning impellor that is “cupped” to catch and scoop the water in a particular direction. Wired in reverse, the cups were actually spinning backwards. This is a bit like trying to eat a bowl of cereal with the spoon upside down. With the small hose, small bilge pump, various twist and turns, and backwards wiring, the bilge pump had probably been doing something like ten gallons an hour. This reversal was corrected.
Also, there was a bilge pump lamp on the electrical panel, but it had never worked in the time that we have owned the boat. The light is a useful thing, as it provides a visual warning when the pump is running. A review of the wiring made the problem apparent. The light was wired directly to the circuit breaker switch, such that if the circuit breaker was on, so was the light. Unfortunately, the circuit breaker was always on, and so was the light, which had burned out, probably many years ago. To fix this, I ran a wire from the panel all the way to the pump itself, such that the light would turn on when the pump did. I also purchased and installed a suitable warning lamp.
Another problem was the pump’s “manual-automatic” toggle switch, also located on the electrical panel. This switch worked, but one needed to hold it down to make the pump run. This didn’t make any sense either. In the event of a major leak, you wanted to be free to fix the problem, not be standing next to the electrical panel with your hand on a switch. So I moved the wiring to the circuit breaker marked “bilge pump.” But this circuit breaker hadn’t been used in years, because the bilge pump was wired directly to the battery. And, wouldn’t you know, the breaker was not working. A spare was available elsewhere on the panel, and this required some minor reconfiguration of the electrical p anel.

More days passed.
I then figured that since I was already running one wire from the electrical panel back to the pumps to make the light work for the lower pump, it would make sense to run another wire to the second, higher-level bilge pump to the engine alarm. This way, if water ever overwhelmed the first bilge pump and kicked the upper one into use, an alarm would sound, loud enough to be heard even outside the boat.
Finally, the bus bar for the bilge pump and its float switch had been located low in the bilge and not too far from the raw water exhaust muffler. In this damp environment, it constantly collected a salty covering, and the connections were often green with corrosion. It was necessary to move the bus bar a bit further higher in the engine room, away from the damp and salt. This was done
In the end, finding these faults, figuring out the best solutions, finding, making, and buying all the parts, and doing the work, all while juggling other tasks on the boat, took more than two weeks.

Finally it was time to test the redesigned system. Mats went back by the new pumps as I pumped water into the bilge from the forward part of the boat, watching for the warning light as I did so. After a moment, the bilge pump lamp lit, but then went dark after just a couple of seconds. Drat. Had the pump shorted out? The light? I pumped more water, and the same thing happened. The light flicked on and then went out just as quickly. I pumped more water, and then ran back to the pumps to see what was happening.
I watched the water level rise, and then the bilge pump kick on. “WHHHHOOSSSH!!!!!” Wow did it work! A water level that had taken the previous set up about 45 seconds to remove was now being swept off the boat in about two. Excitedly, I went to the dock, grabbed a water hose, dragged it below, and opened it full throttle into the bilge. I was eventually able to overwhelm the first pump, and the second pump kicked on. The alarm went off, and the two pumps swept the water out faster than the hose was able to put it in. At one point, the lower bilge pump did become air locked. But I opened the release valve, blew off the accumulated air, and the bilge pump recovered.
I CROSSED “BILGE PUMP” OFF THE LIST!
Time to move to the next item on the list, no? Not quite!
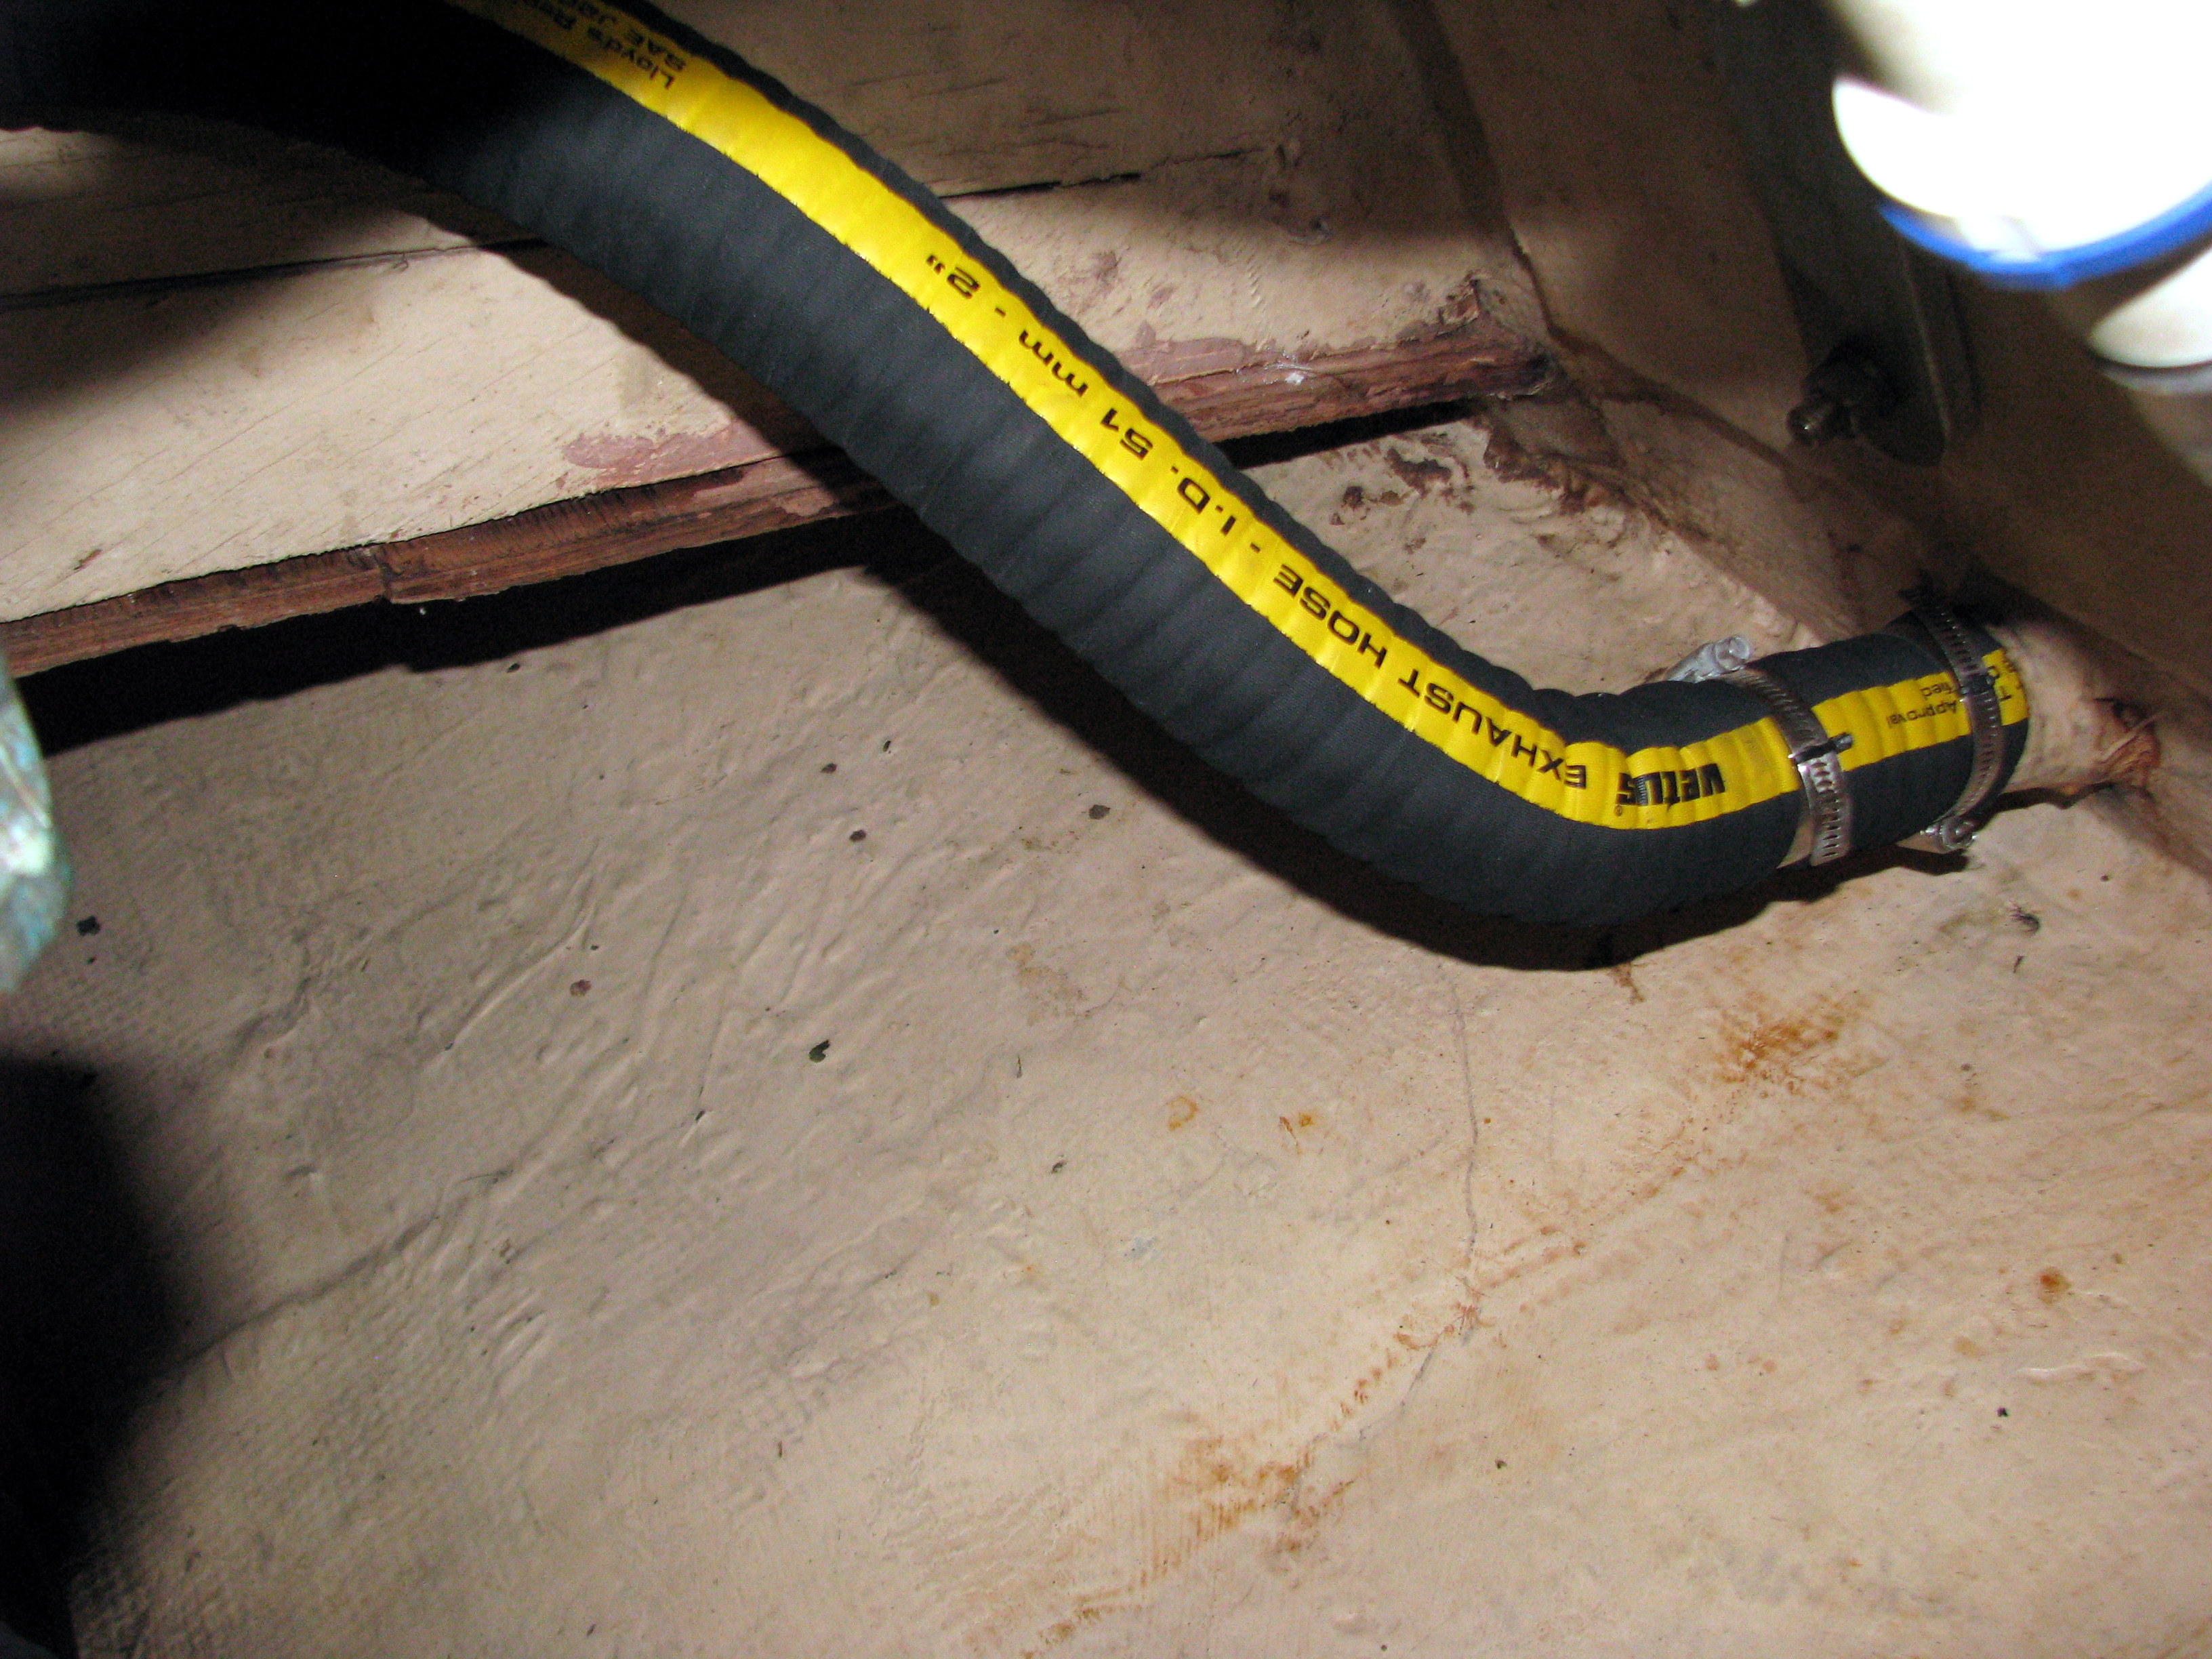
When I had been in the aft locker, buried head first and upside down plumbing the new bilge pump hoses, I also used the opportunity to look at the exhaust hose, which runs nearby. It was chafed through the exterior covering and wire coil in places. The exhaust hose from the transom to the engine would need to be replaced. I had added this to the list.
And a couple of days after I had dried out the bilge while working on the pumps, I noticed a couple of drops of red fluid at the bottom. I took note, cleaned it up, and two days later it reappeared. The transmission sits just above the bilge. I scouted out the source of the leak over the next couple of days, and found it was coming from the rear seal.
This would lead to an even bigger project then the bilge pump.
- Remove and repair the transmission’s rear seal.
- Analyze why the rear seal had failed, and investigate the prop shaft-transmission coupling alignment as a possible cause
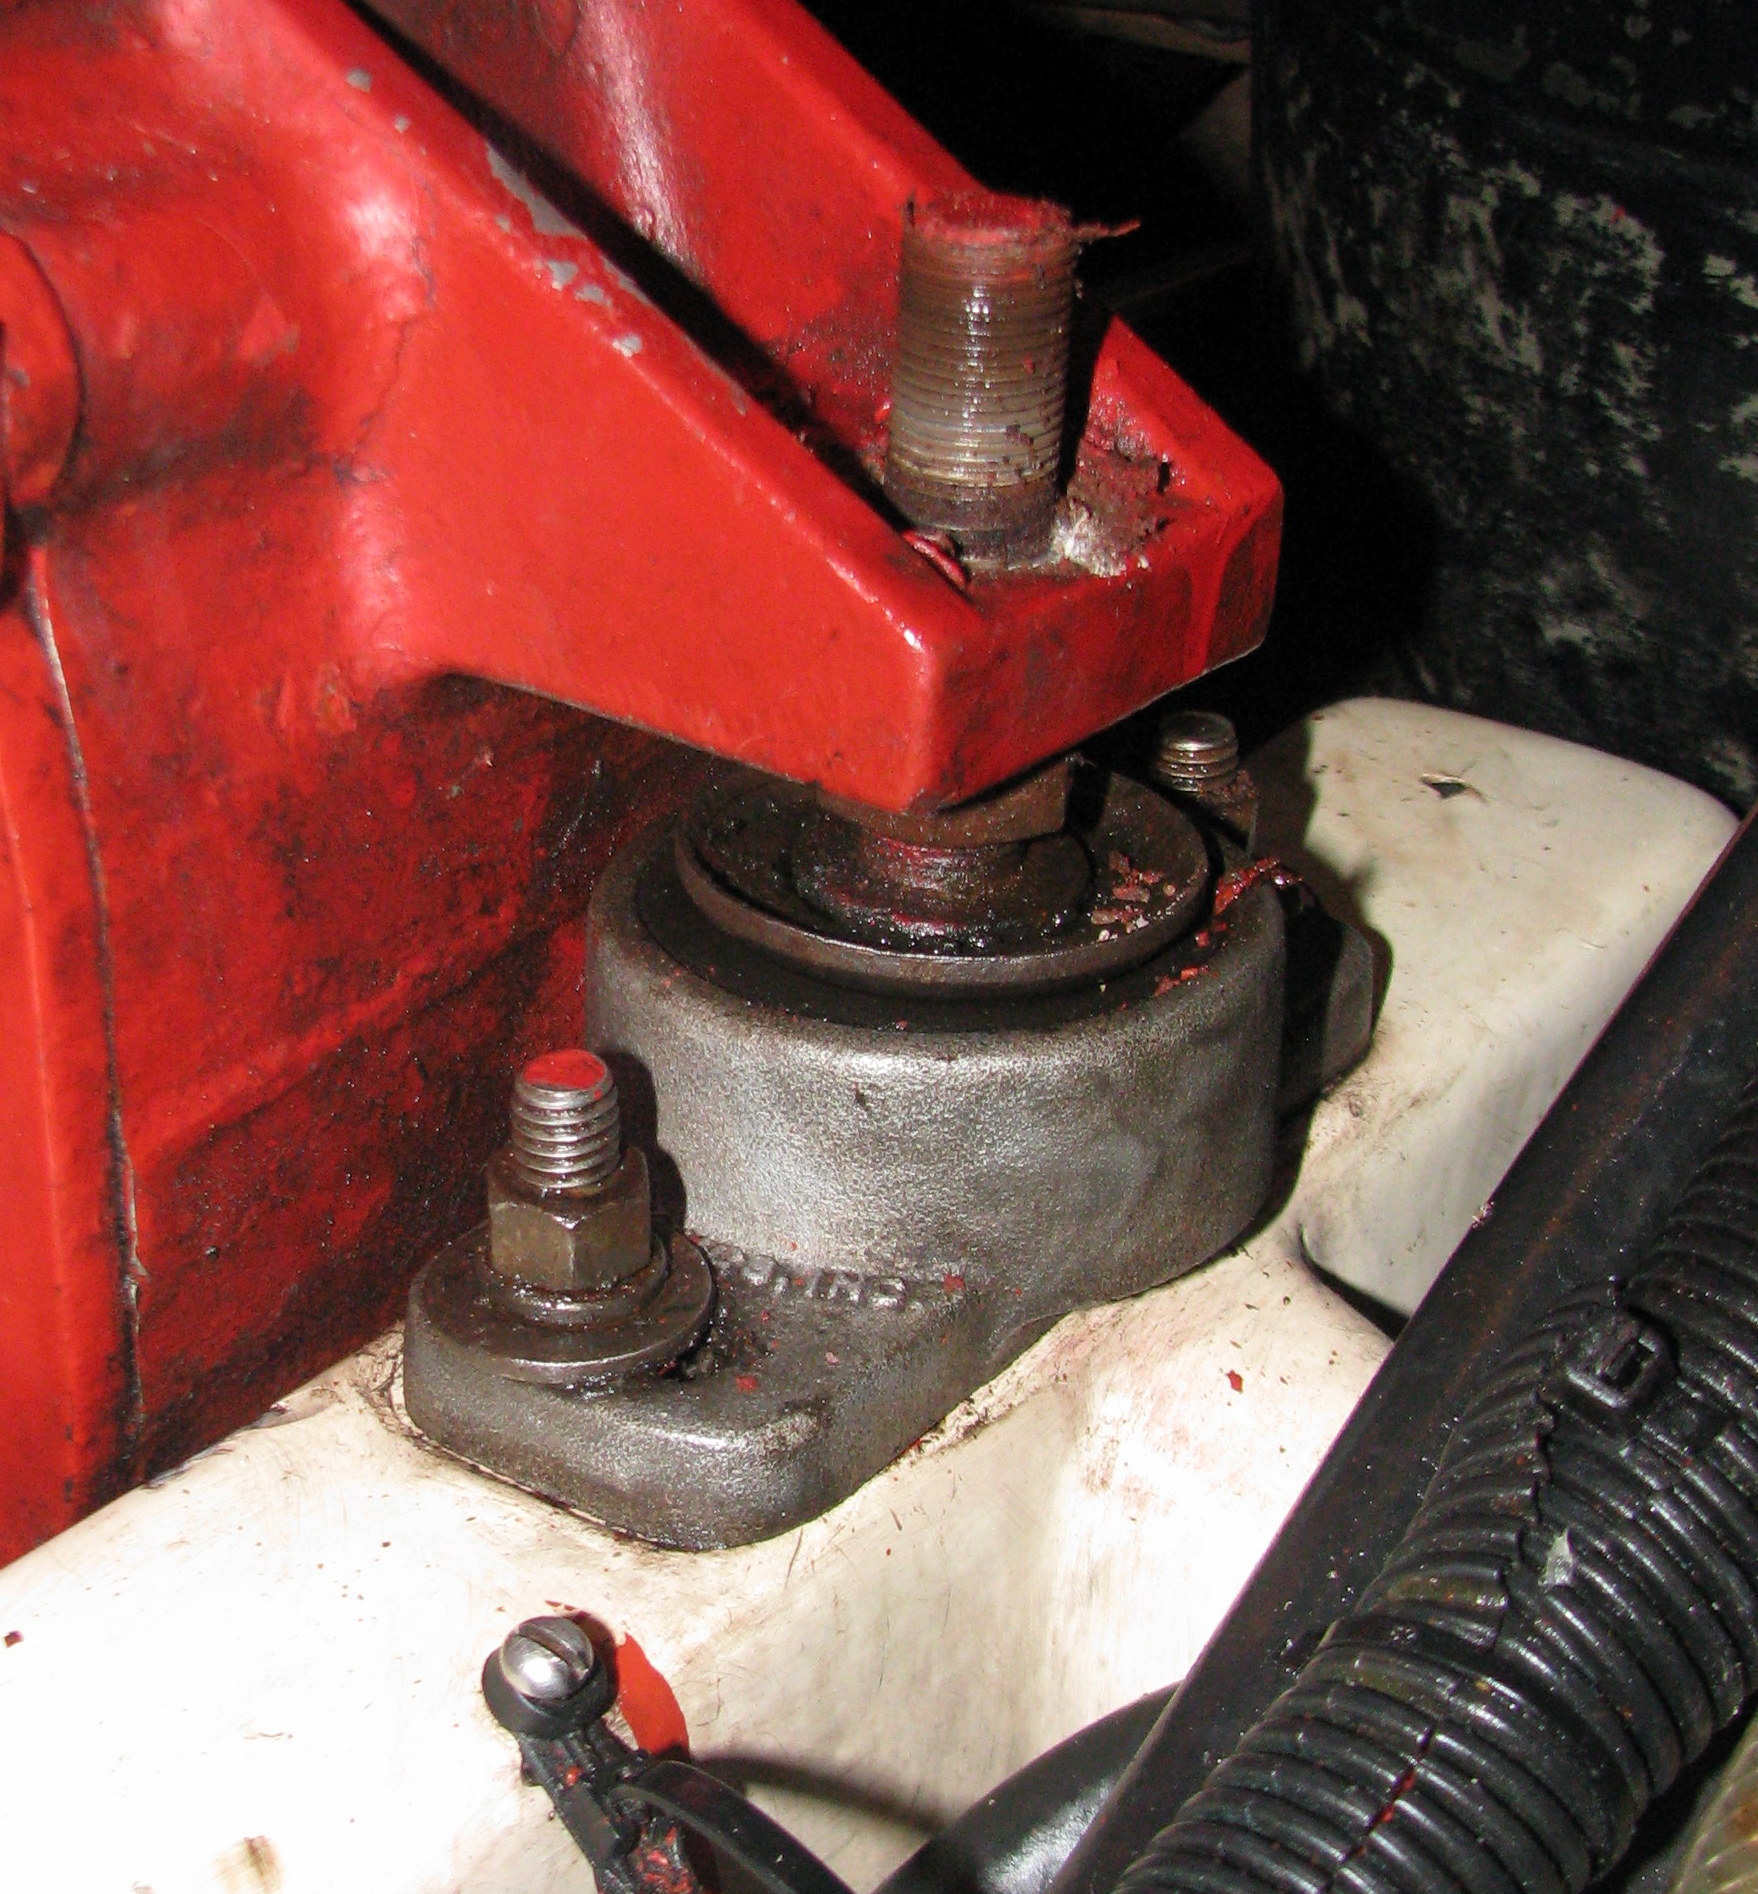
- Determine that the engine alignment was slightly off
- Attempt to reposition the engine on its mounts, and learn that the adjusting bolts were frozen.
- Attempt to remove the adjusting bolts and determine that a new access panel would need to be cut in the galley/engine room wall.
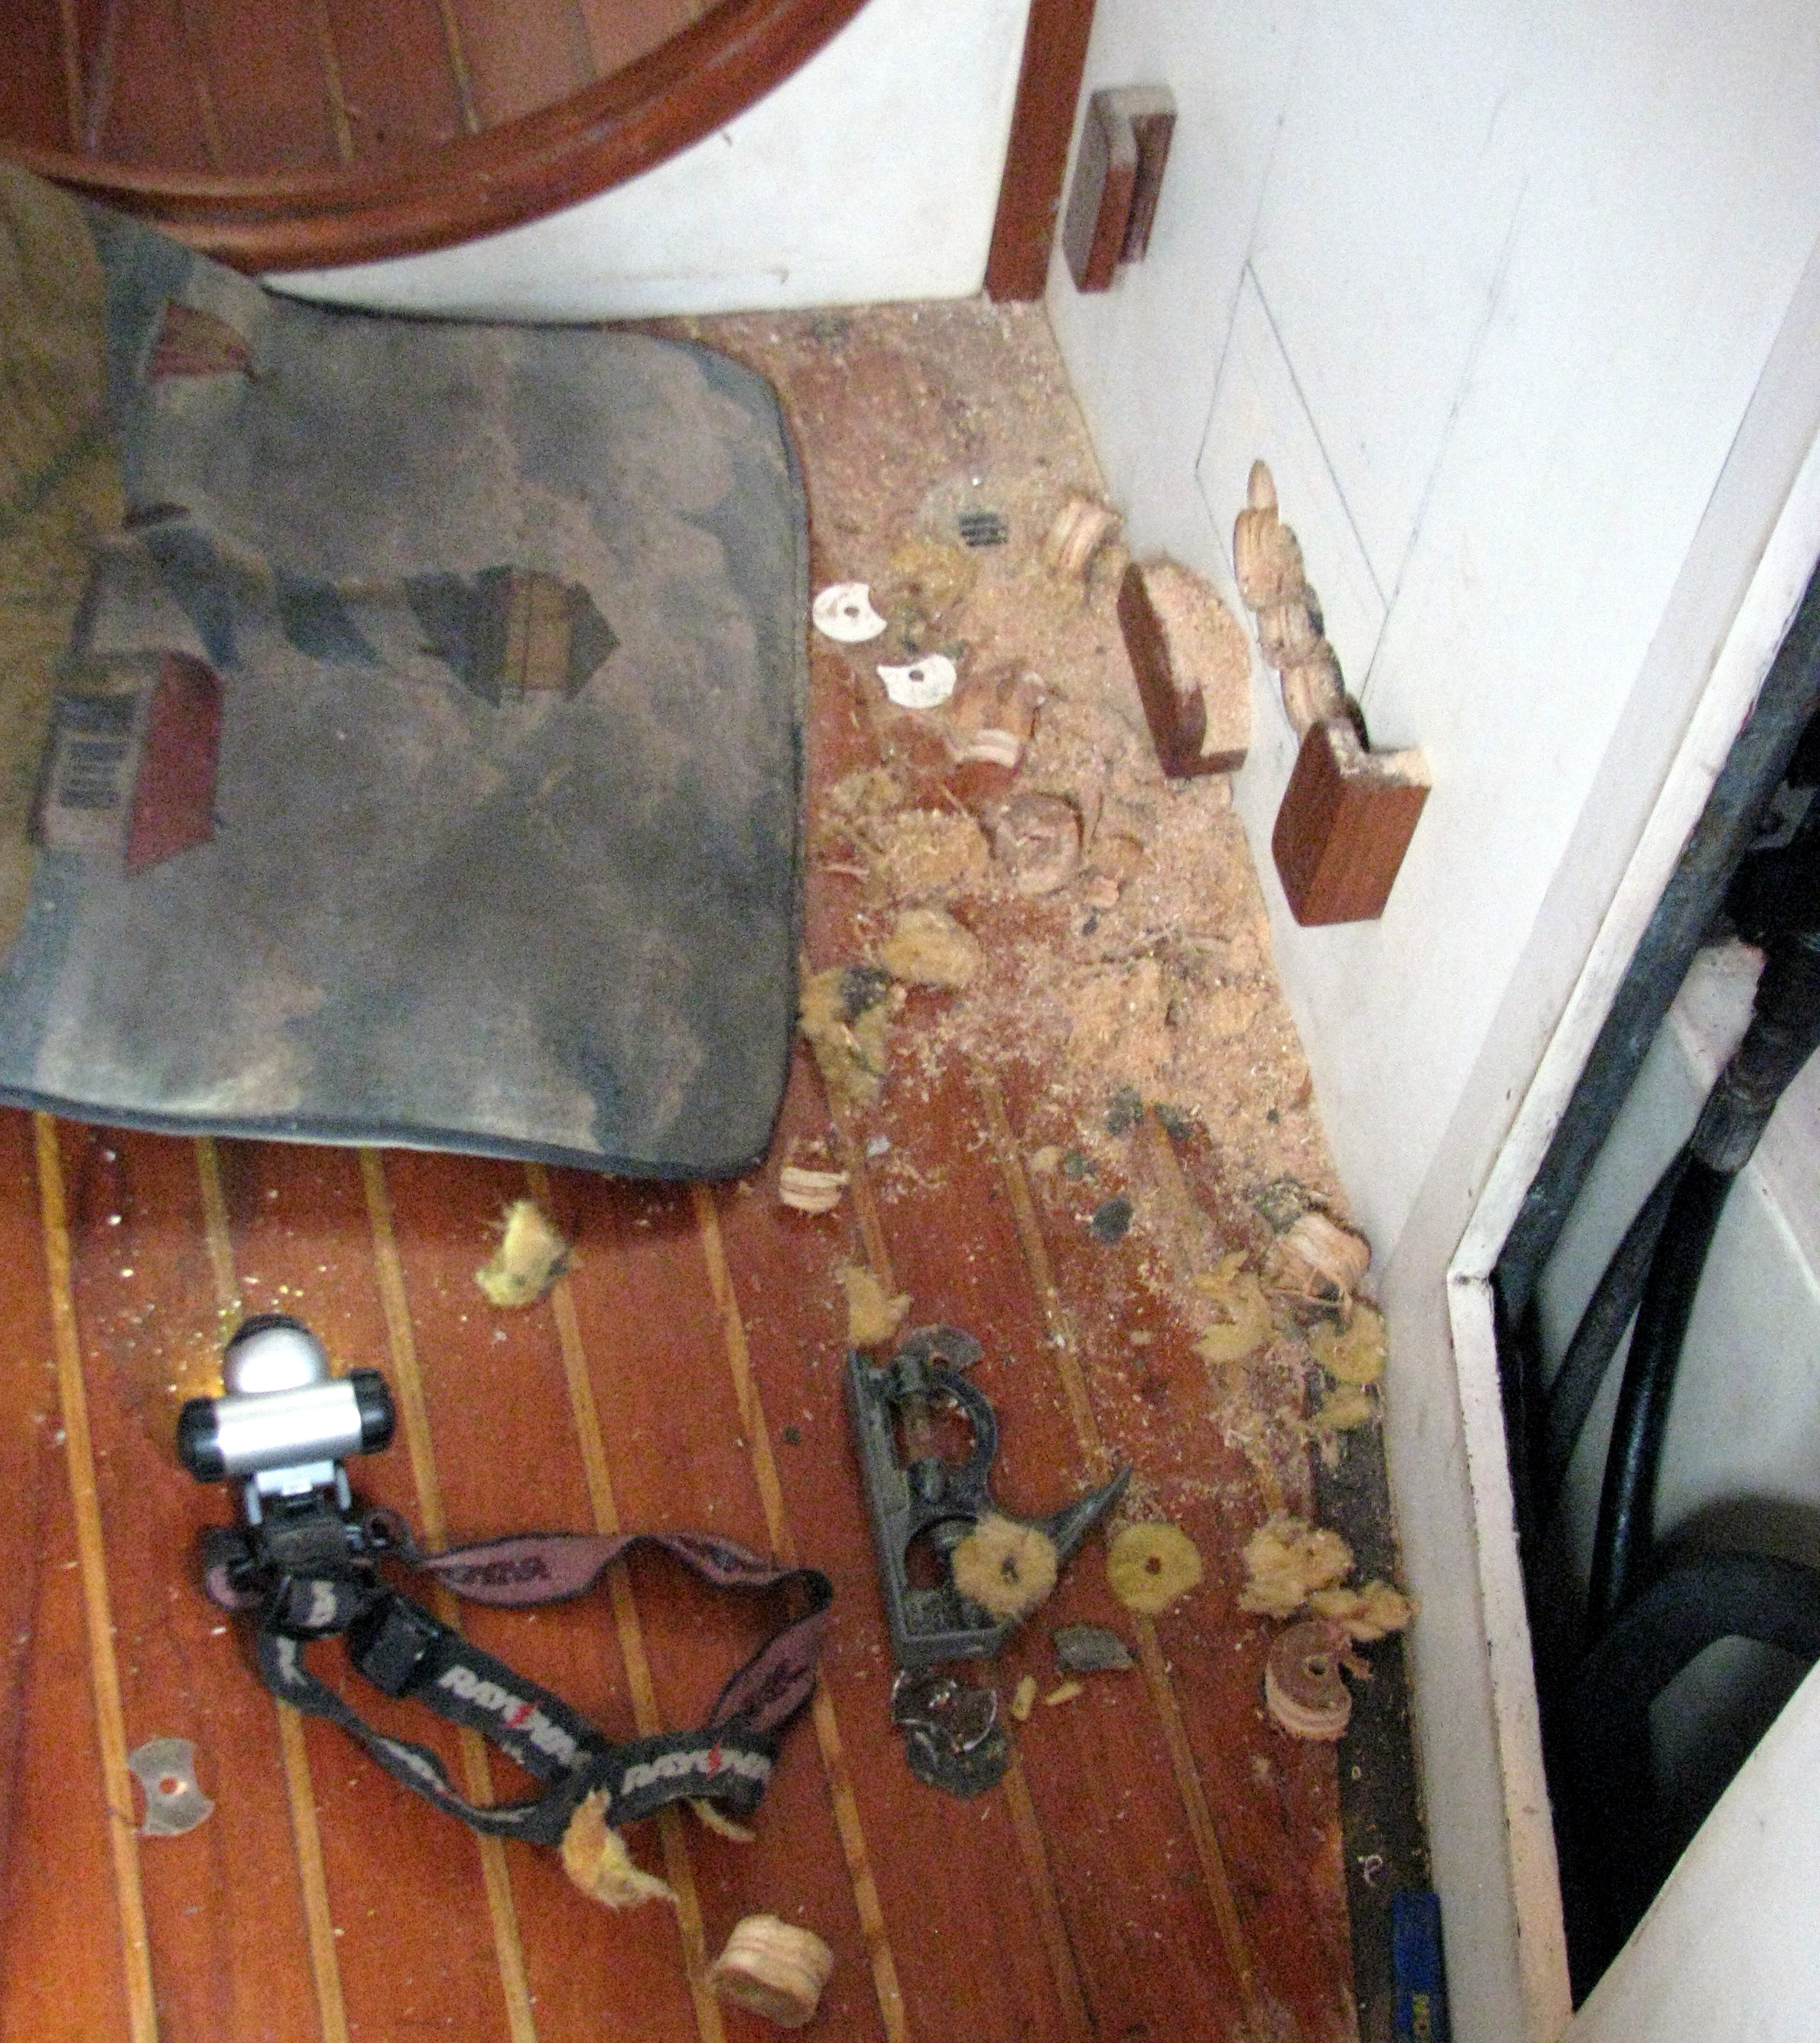
- Lift the engine off of its mounts with a come-along.
- Remove the old and frozen mounts and determine that they would need to be replaced
- Determine that the old engine mounts could be replaced only with the original part, for space reasons; locate the dealer in the U.S.; find a Canadian distributor who could have them sent to a friend who was returning to Turkey from Canada; and get gouged by the distributor for the parts ($300 for $100 engine mounts)
- Epoxy the engine bed to fill in depressions made by the old mounts, which had prevented them from moving.
- Paint the new mounts, install them, and lower the engine back down.
- Realign the engine.
- Re-attach the propeller shaft to the transmission.
- Run the engine to check that everything functioned.
How much more time went by? I dunno. Days. Weeks, I guess, as I stopped to wait for help getting the engine up, finding parts, and waiting for parts to be delivered. Several projects would be going on at the same time to allow for such stops and starts.
So here then are stories for just three items on the list. And as long as they seem to be, these descriptions don’t actually describe all the twists, turns, and missteps. For example, with the engine mounts, the first mechanic with whom I spoke incorrectly told me that the old engine mounts could still be used, and a the second mechanic argued that the mounts could be machined into usefulness, oblivious to the fact that the mount’s rubber shock absorption properties were shot.
So that’s how three weeks can become three months in boat land. But it all got done, and Marmaris Yacht Marine, crawling with scores of other boaties doing the exact same thing as us, in the warm southern Turkish spring, was a comfortable place to do it. We got it all finished at the start of May, and put Leander out to sea again.
For our sake as much as your reading pleasure, here’s a list of what Sima, Mats, and I accomplished during these three months.
ELECTRICAL
- Repaired stainless steel screw-on cover to shore power outlet, which would not close and was secured at sea by duct tape;
- Repaired corroded wire on overboard zinc;
- Serviced anchor windlass by cleaning up all electrical wiring and dismantling and lubricating all mechanical parts;
- Cleaned all terminals on electrical panel;
- Replaced non-working engine alarm buzzer at electrical panel.
ELECTRONIC
- Trouble shot defective wind instrument, climbed the mast and identified the problem as water ingress at mast head unit, attempted temporary fix, and then had broken connector replaced by Raymarine technician; reinstalled;
- Purchased Navionics chip for use in the chart plotters for the remainder of Europe not covered by our current Mediterranean chip;
- Removed stereo, which was shutting off after playing for short period of time. Took to electronics shop, which identified moisture ingress, and repaired. Reinstalled stereo;
- Determined that our upgraded Raymarine Chart plotter alarm system does not come with volume control, and is pegged at level that is almost imperceptible. Apparently, Raymarine has kept the volume so low to encourage users to purchase an extra, proprietary cable to wire to boat’s speaker system, at an additional cost of about $200. Determined that a more simple option would work, by wiring a simple automobile “chime” into the chart plotter. (Wish that Raymarine had disclosed this before they upgraded my chart plotter under warranty because the old one had never worked properly.);
- Tested all Navionics CF charts in new chart plotter system and determined that three of them, including two needed for our return to the U.S., do not function with the “upgraded” software. Am encouraged by Raymarine to purchase new charts that work with the chart plotter. (Wish that Raymarine had disclosed this, too, before they upgraded me.);
- Purchased and installed electronic barometer, including pressure-drop alarm.

- Trouble shot non-functioning SSB radio. Removed SSB tuner from aft locker and located corroded wiring at antenna entry. Replaced missing entry-gasket. Replaced and rewired corroded junction box. Tested radio;
- Trouble shot non-functioning VHF radio, which intermittently fails to transmit. Obtained another radio from fellow cruiser, and wired that to boat antenna and power and grow system, and wired boat radio to secondary cabling and antenna in an effort to isolate the problem. Failed to find specific problem, but radio nonetheless seems to be working more consistently;

- Created comprehensive wiring diagram for entirety of electronics system;
- Installed Raymarine “Life Tags,” purchased before we left, which are used to automatically sound alarm and mark chart plotter in the event of man-overboard situation. Underwhelmed by the quality of the gear.
EXTERIOR
- Thoroughly cleaned and then “detailed” the exterior of boat, removing all rust, varnish, and other stains, and removed extensive tape residue left from previous varnish work;
- Identified several water leaks in aft toe rail at dinghy davit entry, chain plate entry, stern light entry, GPS unit entry, and along caulking line. Removed entire back rail and dinghy davits. Removed all teak plugs and wood screws. Re-caulked aft toe rail. Epoxied wood screws and replaced. Inserted new teak plugs, expoxied them, and sanded smooth. Repeated job a second time when epoxy didn’t take. Reconfigured GPS entry and resealed. Replaced back rail after having new stainless steel backing plates made to bolster current plywood backing in places; re-caulked. Replaced dinghy davits, after having two minor cracks re-welded. Removed small amount of deteriorated wood around chain plate entry. Re-caulked. Had new chain plate cover made of stainless steel to cover slightly larger resulting hole. Removed back stay, removed old plate, drilled new holes, caulked, and replaced. Sanded entire aft toe rail and treated with three coats of teak oil;
- Sanded grab rails and eyebrows and applied four coats of varnish. (Nine coats to UV deteriorated forward starboard rail);
- Light-sanded rub rail and toe rail and applied three coats of teak oil;
- Purchased extra large polar fleece pants and had five excellent and stylish looking fender covers made using the legs. All good, except that there are six fenders, and marine canvas worker inexplicably forgot to save one leg for the last one and made a mishmash of it using bits from the other fenders;
- Purchased 2.5 meter section of 2.5 inch pine for passarelle. Drilled holes in it. Painted holes orange and black. Purchased aluminum brace for sides, sanded, primed/etched, and painted black. Cut ten slats to serve as non-skid. Sanded all smooth. Hand painted “LEANDER” on end. Applied five coats of varnish. Purchased and installed swivel wheels. Rigged to operate with dinghy davit lifts to provide support;

- Repaired tear in boat’s winter cover caused by storm;
- Replaced broken zipper on cockpit cushion;
- Removed bimini, treated with soap and water and then lemon juice to remove rust stains. Replaced. Treated with water proofing;
- Installed hooks to hold swiveling cockpit chart plotter in place when turned back and forth from aft-facing to forward facing;
- Identified leaks at pedestal, which cause water ingress into engine room during heavy rains;
- Purchased life jacket and toddler climbing harness to tether Alexander into cockpit when he is on deck at sea;
- Repaired teak cup holder in cockpit by inserting oversized plug where screw hole had rotted away. Sanded smooth. Re-varnished. Re-drilled hole and replaced in cockpit;
INTERIOR
- Re-glued plastic support to slides holding moveable grating/doors at aft cabin clothes’ cubbies;
- Replaced gasket and Plexiglas in five port lights, specifically addressing leaks at port in bathroom and aft work room. Re-machined several of the aluminum frames where the stainless steel screws had caused galvanic corrosion sufficient to cause the screws to fall out. Polished the frames. Re-sealed with caulk and replaced;
- Had new mosquito netting hatch covers made to replace older ones which had become UV damaged;
- Had new settee cover made, matching bed spread, to replace the one ruined by a marine canvas worker in Fethiye last year;

- Had covers made for end of bed, matching bed spread, to protect from “oily hands” traffic around engine room;
- Had new throw cushions for main cabin to replace faded ones we’d had since New Zealand;
- Designed and fabricated plywood “preventer” to insert into main cabin stairway to prevent Alexander from climbing; Sanded smooth and applied several coats of varnish;
- Replaced hinges on bathroom door, which had not been closing properly;
- Repaired deteriorated hinges on two engine room doors and hinges and latches on three other locker doors;
- Repaired broken arms on two hatch covers.
LIGHTING
- Machined stainless steel brace for new foredeck light to replace original light, which had never worked. Installed brace at radar basket on mast, wired and installed light;
- Repaired overhead lights at nav station and galley counter, which had slight water ingress and corrosion during winter absence. Installed plastic backing in lights to protect against future water damage;
- Removed non-functioning stern light, identified corroded wiring and re-configured wiring through the deck.
DINGHY
- Removed, repaired, and replaced dinghy drain plug;
- Had marine canvas shop re-fit the canvas dinghy cover, which had been done in New Zealand, by a professional shop, but which had fit like a lunch bag, and caused water to pour into the dinghy when it rose to planing speed;
- Repaired leak in dinghy body with glue and patch.
ENGINE
- Refastened loose raw water strainer to engine room wall;
- Removed small amount of contaminated water from inside of fuel tanks;
- Replaced on/off switch at alternator, which had deteriorated at connecting pole;
- Troubleshot battery charging problem. Replaced wiring harness at regulator. Replaced alternator belts (but then returned to formerly-used, stronger belts). Had two technicians aboard who provided conflicting and, ultimately, incorrect guidance. Cut and replaced connectors of charging cable at alternator, as holes in connector were too large for poles. Cut and replaced connector at grounding cable on engine. Load tested batteries. Removed and bench-tested alternator. Removed cables from main charging pole and ran directly to batteries, which, finally, solved the problem;
- Replaced damper plate while transmission was out and access was available;
- Removed starter and solenoid from engine to identify intermittent engine starting problem. Took to mechanic. Had solenoid replaced. Cleaned, sanded, repainted, and replaced starter and solenoid;
- Changed engine oil and oil filter;
- Replaced primary fuel filter;
- Replaced secondary fuel filter and cleaned Racor bowl;
- Drained and replaced engine coolant;
- Removed and replaced fresh water pump;
- Removed heat exchanger and cleaned out bits of rubber raw water impeller which had migrated there at the end of last season when impeller failed. Cleaned, brushed, repainted, and replaced heat exchanger. Treated oil cooler at the same time, which had to be removed to access heat exchanger. Removed, cleaned, oiled, and reinstalled all related hose clamps;
- Removed slightly leaking rocker cover gasket. With rocker cover off, checked and adjusted clearances for rocker arms. Cleaned, brushed, and repainted rocker cover. Reinstalled with new rocker cover and rocker cover bolt gaskets;
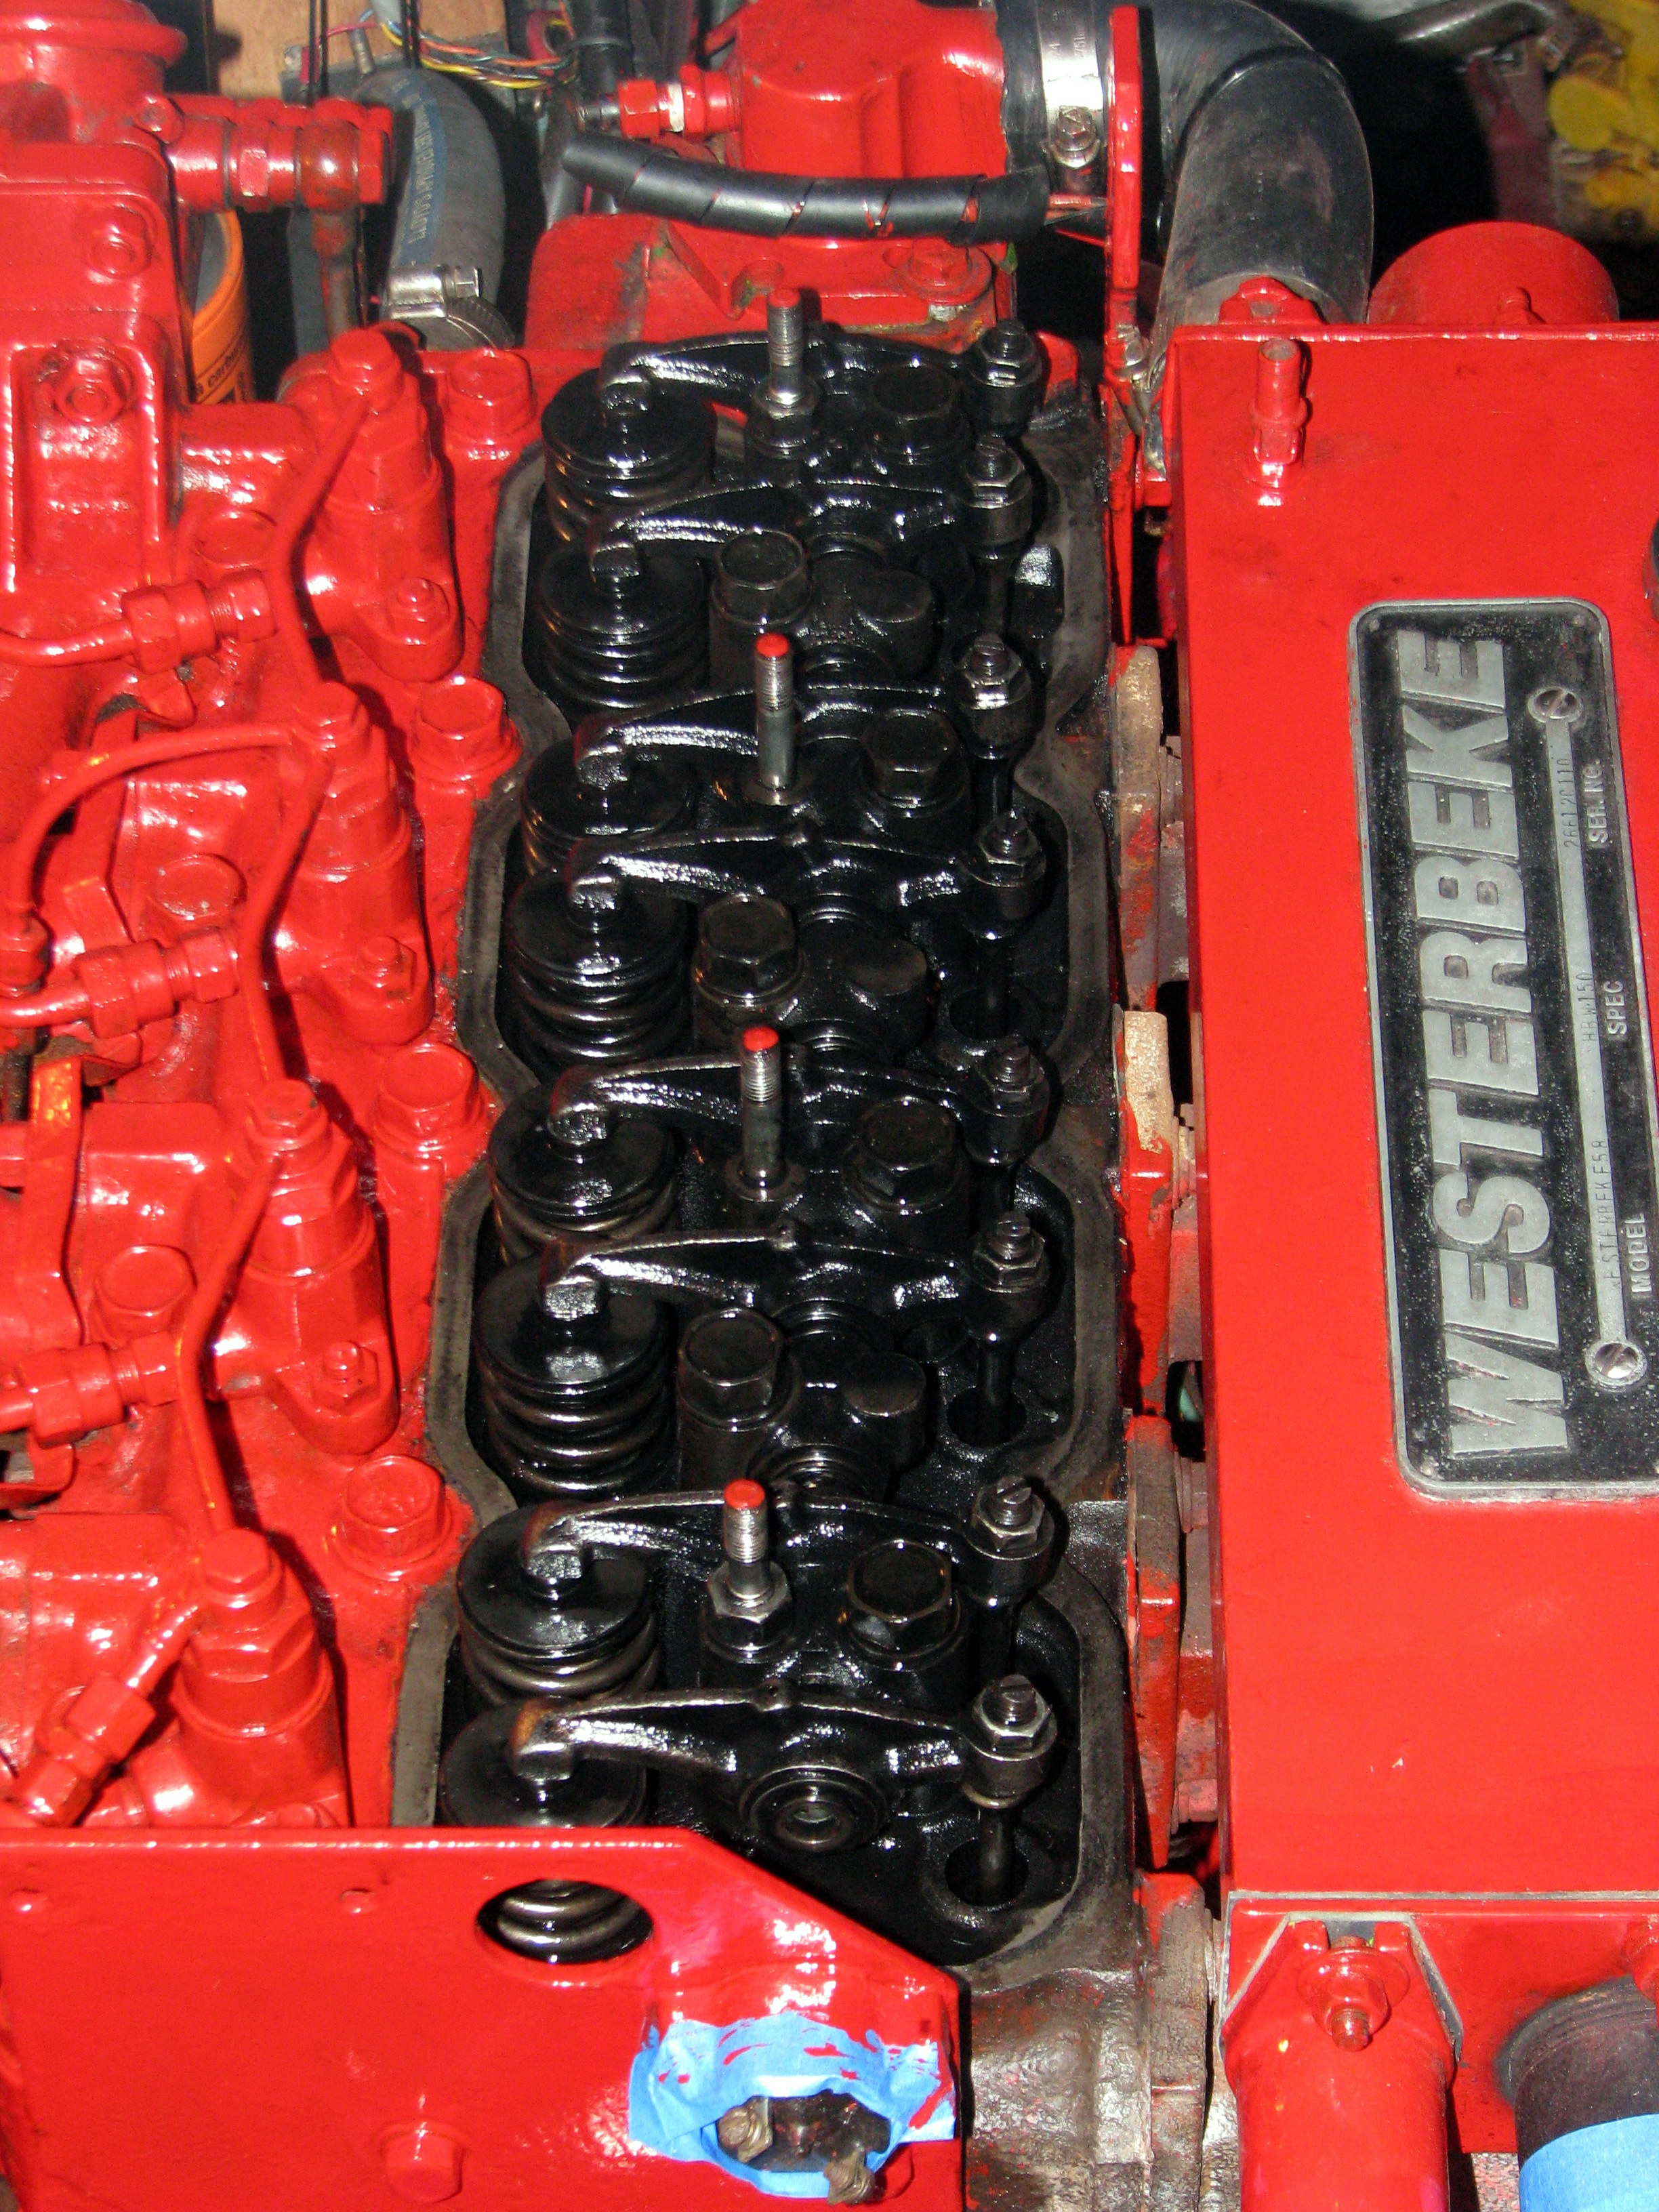
- Cleaned off entire engine and touched up paint at deteriorated areas. Applied light coat of WD-40 to entire engine;
- Removed fuel solenoid from engine block and had broken bracket welded. Cleaned, brushed, painted, and replaced;
- Cleaned area under and around engine. Put new oil absorbent cloths under engine.
- Trouble shot minor diesel fuel leak around high pressure fuel pump. Tightened hose nuts on connecting pipe;
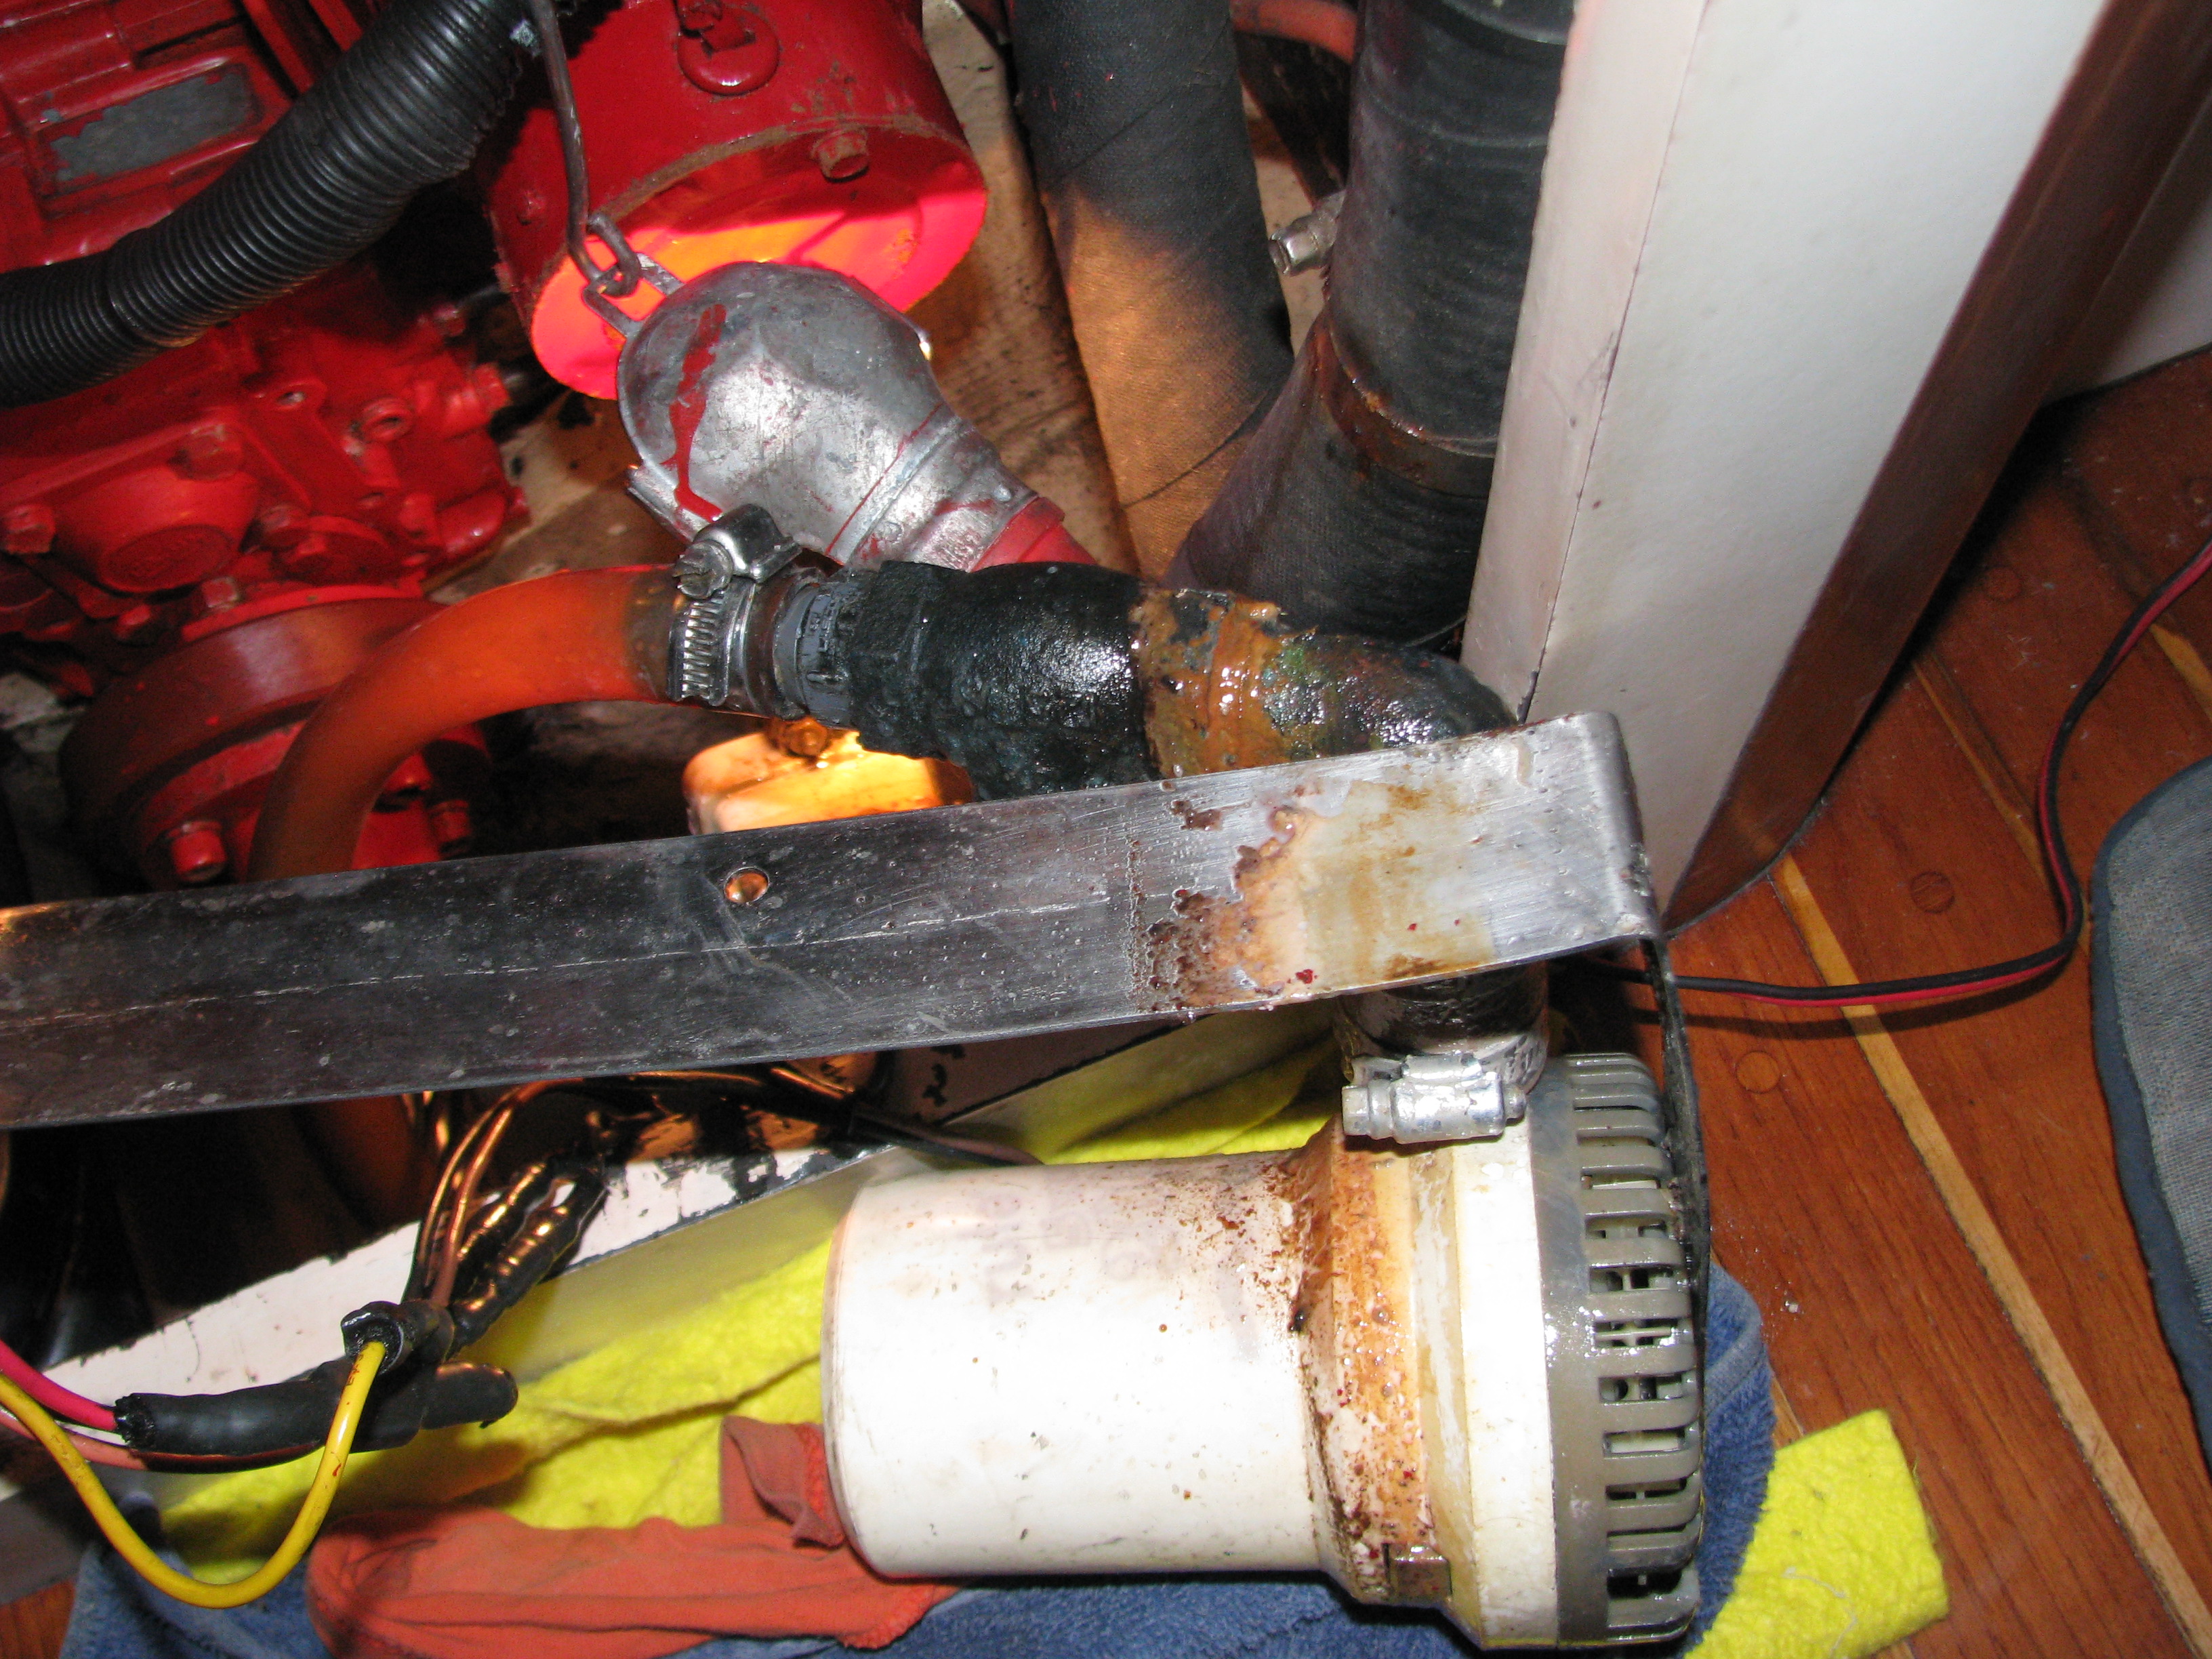
- Identified deterioration in exhaust hose requiring replacement. Removed old hose and replaced with nine feet of raw water exhaust hose. Re-plumbed and fastened hose run from transom to engine room compartment;
- Had fabricated replacement stainless steel fittings (two) to replace corroded fittings in raw water exhaust system;
- Removed and serviced stainless steel anti-siphon loop at raw water exhaust loop;
- Cleaned, brushed, and repainted engine oil drain pump;
- Removed raw water pump for check up. Removed deteriorated impeller for replacement. Also identified deteriorated and non-working seal and bearing. Had serviced, replaced. Reinstalled raw water pump;

CANVAS AND SAILS
- Replaced main sail and head sail, which had been taken down for the winter;
- Repaired slight tears in bimini;
- Had lanyards made to pull on StackPack and lifeline gates.
RIGGING
- Went up mast to remove topping that had parted, caused by deterioration of line’s outer UV protective braid. Purchased new Deyneema replacement and had it spliced by rigger. Went back up the mast and replaced;

- Repaired small perforation in cover where mast enters boat through the deck, which had been causing a slight water leak;
- Replaced broken machine screw holding spinnaker pole brace in place. Machined screw head so that pole would fit in place;
- Performed rigging check;
- Serviced five winches by taking completely apart, soaking in diesel, cleaning all parts, and reassembling;
- Cleaned mast base and flushed with fresh water;
- Removed both jib sheet sheave bases, through which there was slight water ingress. Cleaned off old caulk, prepared surface, re-caulked, and replaced.
PLUMBING
- Repaired broken screws on head seat, repainted, and replaced;
- Removed sink drain macerator pump, which clears water from the galley sinks. It had been leaking at end of last season, spilling small amounts of salt dish water into the bilge, and upon return to boat was found to be inoperable. It had been “repaired” in Marmaris last year, but the repairman did a terrible job, fitting the parts together improperly and causing the leak. A fellow cruiser who had for several years been living and working in Marmaris offered to take me to a repair shop where the proprietor “really knew pumps cold.” Into town we went, and I was taken to the same fellow who had messed it up last year. I gave him another shot. “The seal is leaking, but it’s otherwise in great shape!’ I took it back, trying to cut my losses. Back aboard Leander, I took the pump apart and found the electrical side, which the repairman had ignored, to be severely corroded from the salt water ingression. I cleaned all the components, removed the rust and corrosion with small tools and a wire brush, repainted it inside and out, and reassembled. It still did not fit together properly. I took the pump to a second repairman that I had since come to know. He noticed that the earlier mechanic had damaged some of the notches that serve to hold the pump together, and he re-tooled the parts to fit. I took the pump back to boat, re-installed, re-plumbed, and re-wired it. It now works like a charm;

- Refilled propane tank;
- Trouble shot the gas cooking system after propane odor detected, and found a leak at the regulator, possibly caused by propane tanks being over filled. Replacement found, and fittings made to fit in with solenoid switch and pressure gauge. Regulator re-plumbed and replaced;
- Trouble shot slight fluid leak in storage tank No. 3;
- Purchased and installed new tertiary bilge pump for main cabin;
- Turned all thru-hull sea cocks and oiled.
This is as good as a place as any to list, too, the work we did in November of last year, in the days before we left the boat for the winter.
- Closed all seacocks, except for cockpit drains;
- Pickled watermaker and removed its filters;
- Cleaned and waterproofed bimini and dodger;
- Emptied, defrosted, drained, and cleaned freezer and fridge;
- Lubricated electrical connections on the batteries and all nearby connectors;
- Checked and topped off the battery fluid;
- Assessed battery charging problem, including removal and bench testing of alternator, checking and cleaning of all wiring and connections, removal and replacement of regulator with a spare, and load testing of batteries;
- Removed marine growth and barnacles from bottom, including propeller, strut, and shaft;
- Changed zincs on shaft, propeller, and strut;
- Washed deck;
- Hand washed cockpit cushions and Sport-a-Seats;
- Lubricated all cleats, shackles, sheaves, and other mechanical parts on deck;
- Applied two coats of oil to the teak rub rail and toe rail;
- Applied three coats of varnish to the teak grab rails and eyebrows;
- Removed dinghy from water, cleaned marine growth from the bottom, hand-washed summer canvas cover, located small leak, covered with winter canvas cover, and fastened it to the deck;
- De-salted the dinghy engine, lubricated, replaced the anode, replaced hand pump to fuel line, and applied fog oil to carburetor and pistons;
- Drained all water from bilge;
- Removed speed log thru hull transducer;
- Cleaned off and lubricated the engine;
- Changed the engine oil;
- Flushed the engine’s raw water system with antifreeze;
- Changed engine’s heat exchanger anode;
- Plugged exhaust outlet for season;
- Removed anchor chain from its locker, rinsed chain, anchor, and anchor locker with fresh water, and replaced anchor and chain;
- Put winter cover on boat;
- Cleaned and lubricated hatch arms and dogs;
- Removed and stored mainsail and jib;
- Made temporary repair to bathroom door hinges;
- Cleaned forepeak storage area;
- Lubricated the electrical and mechanical parts in aft port deck locker (rudder, steering cable, SSB tuner, autopilot, and stern light);
- Inflated and installed new fenders;
- Installed missing pins on back stay turnbuckle;
- Closed and lubricated propane tanks, the propane solenoid, gauge, and regulator;
- Lubricated head pump;
- Stored water hose, electrical cables, and 220/110 transformer;
- Measured and, where necessary, removed for replacement parts needed to be purchased in U.S.
- Met with carpenter to discuss redesign of cabin table.

Next time I buy a house or a car, you’re invited to come visit . . .
LikeLike
wow! staggering and impressive, and so well written. hope you found a chance to celebrate both all the accomplishments and writing it up! You should feel proud for doing the job right and making it work (pumps), as you story expresses with the trail run of water!
jean
LikeLike
trail=trial!
LikeLike
wow, my vocabulary just tripled ! great job on the repairs and thanks for sharing it ! sounds like you are ready for 2 more trips around the world, with a stylish passarelle and a functional stereo. Those are the two things that matter the most when sailing in the Mediterranean, right ? 🙂
LikeLike